mywifiext.net setup
mywifiext not working

Mywifiext.net Setup and Login

Setting up a Netgear Extender using mywifiext.net is a straightforward and trouble-free process. There are various methods you can utilize to set up your extender node. Mywifiext.net setup, WPS setup, and app-based configuration are a few options. All these options are easy-to-perform but if you are looking for the easiest and quickest setup solution, WiFi-Protected Setup should be your go-to option.

Get in touch with us if you experience the following issues while executing the mywifiext.net login and setup for your brand-new Netgear Extender.

  • Can’t access mywifiext.net
  • Mywifiext.net page not working
  • Mywifiext.net setup issues
  • 192.168.1.250 not working
  • Mywifiext.local not working
  • Mywifiext.net login issues

Mywifiext.net Setup Quick Steps

Set Up Your Netgear Extender Smartly With These Tips and Tricks

Configuring any Netgear Extender model using the mywifiext.net web portal can be a little complex, especially for users who are new to Netgear and do not have much technological experience. However, if you follow all the steps with the right guidance and direction, this would be a cakewalk for you.

Follow the below-outlined fast-forward steps to complete the mywifiext.net setup process for your Netgear WiFi range extender.

  • First, Power On the Extender
  • Now, connect a Client Device to an Extender
  • Visit www.mywifiext.net Web Portal
  • Go to “Setup”
  • Select “WiFi Range Extender”
  • Enter the Security Key
  • Set New SSID and Network Key
  • Lastly, connect a Device to an Extended Network
  • Complete Registration
  • Restart the Extender

Your brand new Netgear WiFi Range Extender is configured successfully now. Connect up to 15 devices to your new WiFi extender network to enjoy peerless video streaming, conferencing, and gaming.

One-Touch Setup Setup Without Mywifiext.net

Set Up Your Netgear Extender in Just 5 Minutes With WPS

Netgear provides a one-touch setup option for your convenience. This is a super easy and fast method you do not even need 5 minutes to complete the setup process. It is WPS (WiFi-Protected Setup). Netgear calls it a one-touch setup because it literally requires only one touch from the user’s end to complete the setup. As a user, you do not need to visit the mywifiext.net setup web portal or keep handy the login credentials. You simply need to push your extender’s “WPS” button only once, the extender will automatically find the nearest available network and connect to it.

Here are the steps to follow:

Plug in the Extender

Find a working power source within the room you wish to install the extender and then connect the extender’s power adapter to the power outlet. Make sure the power cable has no cuts or bruises before connecting it to the power source and the power outlet has an efficient and effective power supply. Try to use an outlet which is connected to the inverter to prevent interruption in case of power cuts.

Place the Extender Near the Router

The distance between the router and the extender must not be more than 20 ft. It is crucial for better connection. In case the extender is more than 20 feet away from the router, you won’t be able to establish a successful connection between them.

Push the WPS Button

Now, locate the WiFi-Protected setup (WPS) button on your Netgear Extender and then push it gently. You can use a paperclip or any sharp object if you are not able to press the button properly. After that, wait for a few seconds and then locate the WPS button on the router and push it within 2 minutes.

Your Extender is Configured Successfully

Once you are done with these simple steps, you do not have to do anything except for waiting for the WPS light on the extender to turn solid green. The extender will automatically find your router’s network and connect to it within a few seconds.

Voice Call

Our voice call option enables our clients to talk to our technical experts directly and get the solution over a phone call without any hassle.

Chat

An interactive chat option that lets you talk to a real person, not a robot, and receive real-time responses to all your queries in minutes.

Email

Send your queries and issues to care@mywifiextlogsetup.com. As soon as we receive it, we will reach out to you shortly.

Mywifiext.net Not Working?

Common Mywifiext Setup issues

During the mywifiext.net setup process, users often experience an extensive range of errors and issues. Some issues can be easily fixed with the help of some basic troubleshooting tips while others persist for a longer time which can lead to a frustrating experience. The most common setup errors and issues that you may encounter during the setup procedure are as follows:

  • Mywifiext.net Not Working
  • Mywifiext.local Not Working
  • Unable to Access Netgear Extender Login Page
  • Incorrect Username and Password
  • WiFi is Connected but No Internet
  • www.mywifiext.net Login Issues
  • Can’t Find the Extender Default SSID
  • Server Error
  • Unstable or Blinking LED
  • Mywifiext.net Setup Issues
  • Can’t access www.mywifiext.net
  • www.mywifiext.net Taking too Long to Load

Except for these, you may encounter a number of many other errors while performing a setup process. A few basic troubleshooting tricks can resolve all these types of technical errors and issues. However, if you do not wish to be bothered by indulging in the troubleshooting process, we are always there to support you. Our team of technical professionals can assist you with fixing these errors in the least possible time. You can reach out to us by clicking the button below.

Netgear Customer Service

Most Common Troubleshooting Steps to Fix Mywifiext.net Setup Errors

Fix Netgear Range Extender Issues With These Steps

Although it is a bit complicated to resolve mywifiext.net setup errors, you can always get rid of those with some smart troubleshooting moves. Here are some basic as well as smart troubleshooting steps that resolve mywifiext.net login and setup errors instantly.

  • Switch the Web Browser to Access the Netgear Login Portal
  • Use the Correct Web Portal Link and IP Address
  • Power Cycle the Extender and/or Router
  • Reconnect the Client Device to the Extender’s WiFi Network
  • Reset the Extender’s Settings to Default
  • Move the Extender, Router, and Your Client Device to A Better Network Location
  • Use Another Client Device that Functions Well
  • Keep the Devices that Use Radio Waves Away From the Extender
  • Clear the Caches Files and History of the Browser
  • Ensure the Ethernet Cable is Not Bruised (for wired connection)
mywifiext.net

Netgear Extender Firmware Update

Process to Follow to Update Your Extender’s Firmware

Firmware is an operating system of a WiFi device. It acts as the core part of any extender, router, or WiFi booster. It must be updated to the most recent version or else you may encounter a variety of issues while using your wireless WiFi device.

Being a responsible and reliable data networking brand in the USA, Netgear keeps releasing firmware updates. The purpose of these updates is to boost and increase their WiFi devices’ security, speed, and performance. If your Netgear Extender device doesn’t run on an updated firmware version, you may experience speed, connection, and security-related issues with your Netgear WiFi device.

Here is an easy-to-execute Netgear Firmware update process. Follow the steps to complete the update process successfully.

netgear firmware update
  • First, plug in and power on your Netgear WiFi Range Extender.
  • Connect a computer or laptop to the Extender via an ethernet cable or wireless connection.
  • Open any updated web browser of your choice and visit the Netgear Extender login page using the mywifiext.net web address.
  • Log in to the Netgear Extender web portal.
  • Next, click the “Menu” icon and then go to the “Extender Menu.”
  • Select the “Settings’ option and then “Firmware Update” after arriving at the Firmware Update page. While using certain Netgear Extender models, go to the “Maintenance” option and then “Firmware Upgrade.”
  • Click on the “Check Online” or “Check” option. The options may vary depending on the extender’s model you are using.
  • Check if a new firmware update is available. If so, follow the instructions given over there to update your Netgear Extender’s firmware to the latest version.

Different Setup Options

WPS One-Touch Setup

Netgear Extender WPS Setup option allows users to carry out the setup fastly with just one button push. You do not need to visit the mywifiext.net web portal while using this method.

Manual Configuration

Netgear Extender manual setup is a bit complex but you can readily perform it with the right guidance. Visit the mywifiext.net to get rolling with the configuration process.

App-Based Setup

App-based setup is a smart configuration option. Users must have the Netgear Nighthawk or Genie app installed on their Android or iOS devices to use this method.

Netgear Extender Factory Reset

Resetting the Netgear Extender To Fix Almost All Possible Errors

Netgear Extender Factory reset is a process that sets the extender’s settings to default with just one button push. It is the most basic yet most effective troubleshooting trick to resolve all sorts of technical errors that may occur in a Netgear Extender model.

Before carrying out the Extender factory reset, keep in mind that this process leads to the loss of all types of data and settings that are stored in the device. If you do not have any issues with losing Extender’s current settings, username, and password, you should get rolling with this process without any delay. All you need to do is to follow these basic steps:

  • First, Connect Your Netgear Extender’s Power Cable to a Power Outlet
  • Ensure the Power LED Lights Solid Green
  • Locate the “Factory Reset” Button on the Extender. (It is usually on the rear panel or bottom of the device)
  • Press the “Reset Button” and Hold it for a Few Seconds. (Do not leave the “Reset Button” until the Power LED starts blinking).
  • Now, Wait for the Power LED to Get Stable.
netgear extender factory reset

That’s all. A stable green Power LED on the extender is an indication that your device has reset to factory default settings and is ready for the configuration process. You can carry out the setup process all by yourself and start using an extended wireless network at your home.

Netgear WiFi Range Extender Mywifiext.net Login

Experiencing Netgear WiFi Range Extender Mywifiext.net Login issues? Here are the steps to follow

  • First, connect the extender to a power socket and switch on the device
  • Now, connect your computer or smartphone to the Extender’s WiFi network
  • Go to a web browser on your device
  • Type mywifiext.net or the 192.168.1.250 IP address on the search bar and press the “Enter” button
  • A login page will show on your device’s screen
  • Enter the Username and Password on the required fields
  • Lastly, click the “Login” button

Major Troubleshooting Tricks to Resolve Setup Issues

You must consider These Tips to Resolve Setup Errors

Power Cycling

In most cases, power cycling the Netgear Extender node resolves all sorts of WPS and mywifiext.net setup issues. Simply power off the node and then power it on again after waiting for a few minutes. Reconnect a client device to the extender’s network and then proceed with the setup steps again.

Factory Reset

Resetting the extender’s settings to the default is the most effective solution to common Netgear login and setup issues. All you have to do is to push the factory reset button on the extender node and hold it for a few seconds until the Power LED starts blinking. Within a couple of minutes, your device will be reset.

Firmware Update

Updating your Netgear Extender’s firmware timely is crucial for smooth and uninterrupted functionality. Check if there is an update available for your extender’s firmware. If yes, run an update right away. It wouldn’t take more than a few minutes to perform firmware update steps and complete it.

Adjust Placement

Another effective way to eliminate mywifiext.net login or setup issues is to adjust the placements of your extender, router, and client device as well. So, Move these devices to a better network area within your home and then try carrying out the setup process again. It will most likely resolve all sorts of issues.

IP Address 192.168.1.250 Not Working?

If the Netgear login and setup portal isn’t working while using the 192.168.1.250 IP address, you may try the following tips to fix it.

192.168.1.250 not working
  • It might be possible that the browser you are using is outdated. Update it or switch to another browser.
  • Cross-check the IP address and ensure you are typing it correctly on the search bar. As a single mistake can mess the whole process.
  • Check if the device you are using is connected to the correct Netgear Extender WiFi network.
  • Restart your device and try visiting the Netgear setup portal using the 192.168.1.250 IP address again.
  • Remove VPN and other extensions. They can also restrict the access.
  • Connect to our support team directly if the problem persists for a longer time.
Still Experiencing Setup Issues?

Reach out to us to resolve your Netgear Extender issues.

Manual Steps For Mywifiext.net Setup

In order to configure your Netgear WiFi range Extender manually, here are the steps to follow

  • Supply electricity to the Extender by connecting it to a power outlet.
  • Power on the device and ensure the Power LED throws stable green light.
  • Connect your PC, laptop, tablet, or smartphone to the Netgear Extender’s WiFi network. Make sure the SSID you connect to your WiFi device is correct. NETGEAR_EXT is the correct SSID while “password” is the default password.
  • Head to a browser on your device and then search for mywifiext.net or 192.168.1.250. A “Setup” page will shows up.
  • Tap the “setup” option and then agree with the term and conditions if prompted.
  • Set a new admin name and password. This is for accessing the Extender’s WiFi network settings.
  • Answer the two security questions if prompted. Netgear uses this for recovering your new WiFi extender’s network credentials.
  • Go to the next screen and select the frequency band that you are considering for network expansion.
  • Enter your existing WiFi network security key.
  • Pick the network name and security key for the Extender WiFi network. Tap next to proceed ahead.
  • Netgear Extender will automatically apply your settings and it may take up to a few minutes. Keep patience until you notice different SSID for different bands.
  • Now, connect your client device to the recently extended WiFi network using the credentials that you created just a couple of steps before.
  • Finally, go to the mywifiext.net page again and check the box at the bottom of the page and then tap “continue.”

You have extended your Netgear WiFi Range Extender successfully. Now, there is no action needed. Simply, power cycle your Netgear Extender and start using an extended network all over your home.

Mywifiext.local Setup For iOS Devices

Mywifiext.local Setup option is meant for iOS devices. It is a quite similar setup process to mywifiext.net setup. However, you can use this configuration method only while using an apple device like iPhone, iPad, or Mac. One important thing to notice here is that you can open mywifiext.local web portal not only in Safari but also in other web browsers such as Google Chrome and Mozilla Firefox.

To configure your Netgear WiFi range extender using mywifiext.local, you must have an iOS client device. You need to connect that to the Netgear WiFi Range Extender’s network. The SSID for Netgear Extenders is NETGEAR_EXT. and the default password is “password.” Once you are done with these initial steps, you need to visit the mywifiext.local web portal on your iOS device and then follow the on-screen instructions to complete the configuration. You can also check the user manual to learn about the step-by-step mywifiext.local setup. In addition to this, you can always consider availing of our specialized technical support.

Mywifiext.net Smart Wizard Setup

Mywifiext.net Smart Wizard is a Netgear WiFi Range Extender’s settings that allow users to perform a setup smartly. You need to perform the similar setup process that we mentioned in the manual setup section to carry out a Netgear mywifiext.net setup wizard. First, ensure that all prerequisites are handy with you. Second, attach the power cable of the Extender to a working power socket and then power on the device. Go to the WiFi setting of a client device, locate the NETGEAR_EXT., and then connect to it. Your next step should be to visit the Mywifiext.net smart wizard setting on a browser and then log in to the Netgear setup portal. Now, follow the instructions provided in the user manual to complete the mywifiext.net smart wizard setup.

Can’t Access www.mywifiext.net?

You can access the Mywifiext.net setup portal by simply entering its web address into the search bar of a search engine like Google or Bing. However, you may encounter some errors while doing the same which is common because the Mywifiext setup portal isn’t a regular Internet website. It is only used for setting up and managing Netgear devices. One of the most common errors that users face is the “can’t access www.mywifiext.net” setup portal. This error message may appear on your device screen differently, depending on the browser you are using. Here are the error messages that you may receive while trying to access the Mywifiext.net web portal:

  • Page cannot be displayed when accessing the Mywifiext site
  • You are not connected to a network
  • Unable to connect to the Internet
  • Your computer isn’t connected to the Internet
  • Server not found error message shows up
  • Can’t find the server at www.mywifiext.net
mywifiext

Possible Reasons Why You Can’t Access www.mywifiext.net

There could be many different known and unknown reasons why you can’t access www.mywifiext.net web portal. Here are a few:

  • Your existing router’s internet is not working
  • Your device is not placed in a better network place
  • Your device is not connected to Netgear’s network
  • Your system has a security issue
  • Your system is not compatible with the Mywifiext portal
  • The browser on your system that you usually use is outdated
  • You are entering the incorrect web address
  • The Mywifiext login portal is down
  • Scheduled maintenance for the Mywifiext.net setup site is going on

Fixing Mywifiext.net Setup Portal Access Issues

There are a few ways you can try to fix the “can’t access Mywifiext.net issue.” These may or may not prove helpful for you. However, in most cases, these troubleshooting moves fix any sort of issues that users face with their wireless WiFi network. Find them out here:

  • Check if your device is connected to your Netgear WiFi network. If not, connect it by identifying the default network name from the list of networks available on your system.
  • Check if your existing modem has an active internet supply from your ISP. If not, contact your ISP and ask for the same.
  • Try moving your Netgear device to a better network place. Also, make sure that your Netgear devices aren’t too far from your existing modem or router.
  • Delete the history and cache files from the browser you use and make sure the browser version you are using is the latest.
  • Try using a different device or browser to access the Mywifiext login and setup portal.
  • Enter the IP address of Netgear 192.168.1.250 instead of using the web address to access the Netgear login portal.
  • Contact our Netgear Technical support team using the contact details that you can find at the right top of this page if no moves work for you. We will resolve your mywifiext.net setup issue in minutes.

Mywifiext Password Reset and Recovery

If you want to create a new and strong password instead of using the mywifiext.net default password, you can create it easily. You simply need to access the mywifiext.net website, login into the Netgear account using the default login credentials, and then set up your Netgear user ID and password. You can use these credentials whenever you want to access your Netgear account or admin panel.

In case you forgot your Mywifiext password, you can recover or reset it. To perform a Mywifiext password recovery, you need to answer a few security questions. These security questions are the ones that you were asked when you created your Netgear account. You need to type the same answer that you provided at the time of setting up your Netgear account.

If you want to perform a Mywifiext.net Password Reset, you first need to login into the Netgear account using the default login credentials. After that, locate the Mywifiext.net Password Reset option in the dashboard and perform the actions as instructed. If you encounter any difficulty during this process, consider approaching our technical support. We assure you to help you get rid of this issue.

Frequently Asked Questions

What Mywifiext.net Web Portal is About?

The mywifiext.net is a web address used to access the login and setup page of a Netgear device. By accessing this portal, you can perform various important functions and manage your Netgear device settings easily.

Why Do I Need to Access Mywifiext.net?

You need to access the mywifiext.net web portal to set up and configure your Netgear wireless WiFi device and manage its settings. You can access this site by entering its web address on the search bar of a search engine.

How Do I Access Mywifiext.net?

To access Netgear’s mywifiext.net web portal, connect your computer or mobile device to the Netgear WiFi network. Next, open a web browser and type www.mywifiext.net into the address bar. This action will redirect you to the official Netgear setup page where you can perform various functions along with the setup.

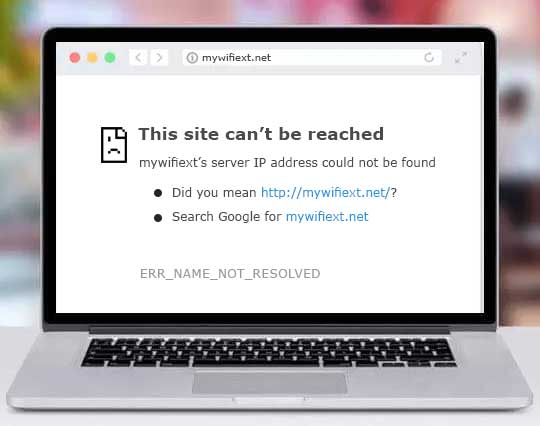
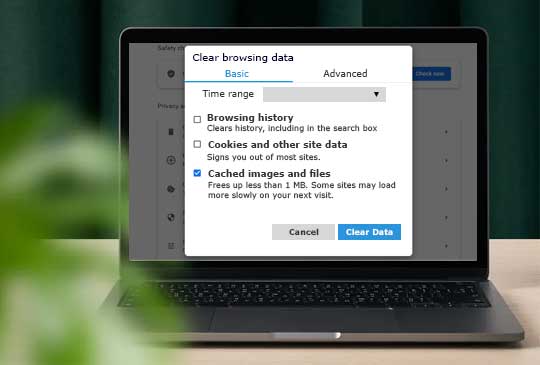
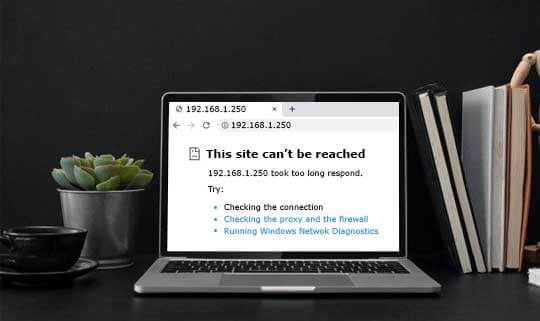
What to Do With the Issues Like “Site can’t be reached” or “Server not found”?

Facing this type of error is common while trying to access the Mywifiext.net setup page. If you face these errors, make sure that your computer or mobile device is connected to the correct Netgear extender’s network, and try clearing your browser’s cache and cookies. You can also consider making use of a different web browser. These things might work for you and fix the error.

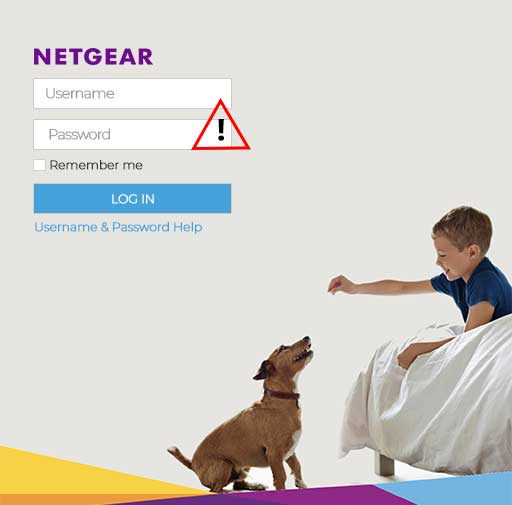
What is the Default User ID and Password for Mywifiext.net?

The default user ID for mywifiext.net web portal is admin, and the default network key is “password. You can use these credentials to login into the Netgear setup portal.

What If I Forgot My User ID and Network Key for Mywifiext.net?

If you forgot your username and password for mywifiext.net, you can reset your Netgear device to its factory default settings by pressing the reset button on the back of the extender for 10 seconds.

How Do I Set Up My Netgear Wireless Range Extender Using Mywifiext.net?

To set up your Netgear wireless range extender using mywifiext.net, connect your extender to your modem and plug it into an electrical outlet. Then, connect your computer or mobile device to the extender’s network and open a web browser. Type mywifiext.net into the address bar, and follow the on-screen instructions to set up your extender.

What If I Encounter an Error During the Setup Process on Mywifiext.net?

If you encounter an error during the setup process on mywifiext.net, make sure that your extender is connected to your modem and that your computer or mobile device is connected to the extender’s network. You can also try resetting your extender to its factory default settings and starting the setup process again.

What is the Difference Between the Mywifiext.net Setup and the Mywifiext.net login?

Mywifiext.net setup is the process of configuring your Netgear wireless range extender, while mywifiext.net login is the process of accessing the extender’s web-based user interface to view or modify its settings.

Can I Access Mywifiext.net From a Mobile Device?

Yes, you can certainly access the www.mywifiext.net web portal from a mobile device as long as it is connected to your Netgear WiFi network and has a web browser.

Disclaimer:- mywifiextlogsetup.com website is for customers who are seeking technical help and technological assistance/support service for WiFi extenders, routers, and WiFi networks. However, we do not have any endorsement, alliance, or affiliation with any brands neither direct nor indirect. All the images, brand names, product models, and logos are only for illustrative purposes. Guidelines provided on the website are solely for informational purposes. Neither a guarantee nor an implied warranty is provided regarding the content available on the website.


    Send Your Query