
Netgear N300 Setup
Is the configuration process of the Netgear N300 bothering you? Or are you not able to use this device effectively? Get the solutions here!
Netgear WiFi extender N300 setup is a tiny and portable device that offers a number of attractive features. Basically, it comes with the latest technology that helps users to get strong internet signals even in dead spots. Although it is an affordable and easy installation device, you can configure it independently. But before starting the configuration process, you need to overview the useful setup points. So, make a connection between the extender and router and utilize these directions.
Netgear N300 PR2000 Manual Guide
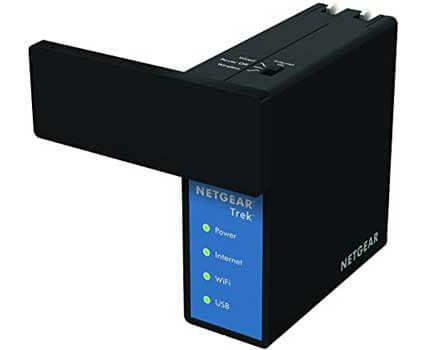
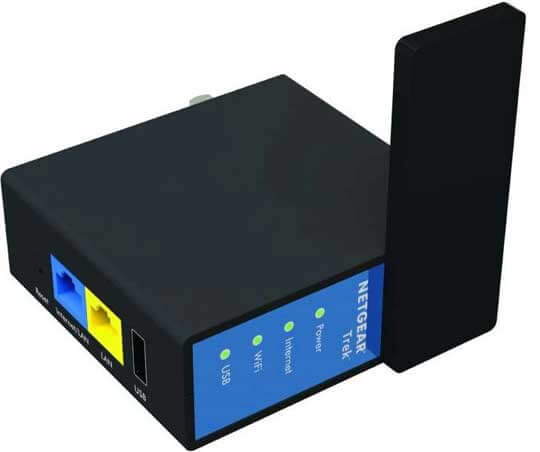
As you get the Netgear N300 extender, there will be the extender itself along with a quick manual. Talking about the extender, it has the WPS, reset, and power buttons on its panel. Also, there will be LEDs that indicate the extender’s working and connection too. Whereas the manual guide contains all the brief information of the setup process, Through which you can get a thorough knowledge of the entire procedure. So, read that guide once to execute the task easily. But, if the guide information is not satisfying you, then get in touch with our experts for more help.
Netgear N300 Setup On Web Browser
By using any web browser on the network-connected device, you can install the Netgear WiFi N300 Extender shortly. But prior to performing the process, collect some prerequisites that you will require while setting up the extender.
Essential Things For Set Up
- An existing router with an active internet connection.
- Any device and access to the updated web browser.
- The unoccupied electrical power socket in working condition.
- Extender’s default web or IP address with Login details.
Setup Points For Netgear PR2000
- After unboxing the device, plug it into an electrical power outlet.
- Verify its LED and the power supply as well, to take the next step.
- When the device becomes connectable, join your device with it.
- For this, select the wireless network from the list and insert the password.
- Following this, open a web browser on that network-connected device.
- Then, search the extender’ default web or IP address in the search panel.
- Here, fill in http://www.mywifiext.net as the PR2000 web address.
- As a result, the login window will appear on the device’s screen.
- Next, fill in the extender’s default login credentials in the required field.
You can take these details from the manual guide, but if it is not there, then our professionals can help you to get that.
- After logging into the N300 setup, make use of the on-screen directions.
- More than that, select the network to which you want to extend the range.
- Lastly, fill in the extender’s username and password and tap OK.
- Hence, the process is complete and the extender will be ready for usage.
WPS Method For Netgear WiFi Extender N300 Setup
Fortunately, the Netgear PR2000 setup comes with an easy WPS function that allows users to configure it in no time. Make sure that the existing router has a working WPS button. Interestingly, there is no need to use the extender’s web or IP address and login details. Which is why it is a comfy and Push-To-Configure method.
- Firstly, fix the extender into a power socket closer to the router.
- Now, turn the power button on and check the extender’s light.
- Further, push the extender WPS button from its front panel.
- By doing this, the Netgear N300 setup will become findable.
- Then, within the next two minutes, push the router’s WPS button.
- Wait for a minute and let both devices attach together.
- Finally, LEDs on both devices will turn to solid color.
- Afterward, connect your device to the network and get a strong signal.
- If your device is not connected to the wireless network, make a wired one.
- Use a new ethernet wire and insert its ends into the extender and device.
- Thus, the connection will complete by any method from these both.
While using these setup points, if you are still getting issues in the process, contact our experts to remove them. They will help you to make and complete the process so simply.
Issues In Netgear PR2000 Configuration Process
Some errors can be identified or unidentified and can create problems in the configuration process. That can be in the extender or in the router’s working. Have a look over some regular issues that are encountered during configuration.
- The power outlet may not be giving proper electrical supply.
- Router’s current internet is not active or not providing signals.
- You may use the extender’s incorrect web or IP address.
- Or the extender’s mismatched login username and password.
- The Netgear extender is not able to make a connection.
- Or the extender and router’s WPS buttons are not working.
- Netgear N300 setup LED is not indicated with ideal colors.
- You are using a broken or malfunctioning ethernet wire.
Errors In Usage
- The extender is not in the range of the router and is not getting signals.
- Or your devices are not in touch with the extender network.
- Your Netgear N300 setup’s signals are interrupted by metallic items.
- Loss of connection between the extender and the device.
- The connected device is running on an outdated web browser version.
- Probably, the extender’s firmware version is old or not updated.
Fix Those Common Errors
To troubleshoot those issues in the extender, utilize the below-mentioned resolving tips. No matter, whether you are able to find the source of the error or not, these tips will surely work for you.
- Disconnect your devices and make the connection again after some time.
- Later, verify the extender and the router’s LEDs to check the connection.
- If the issue still persists, unplug the extender and the router too.
- Leave both devices unplugged and let them cool down the overheating.
- After waiting for some time, plug both devices in again to sockets.
- Prefer to use another or well-working power outlet this time.
- Place all devices closer and connect them again, and check their working.
- Keep away metallic and electrical appliances from the extender.
- Take and use the extender’s correct default web or IP address.
- Also, fill in the extender’s right login details while reconnecting it.
- Try to use a new ethernet wire to connect the device to the network.
- More than that, change or swap the extender’s frequency bands.
- Check the router’s existing internet plan and update it if required.
- In addition to that, update the connected devices’ web browsers.
- Furthermore, use different web browsers and different locations.
- If the router is not connected, then replace it with a new one.
While using these resolving points, keep in mind to check the extender’s current firmware file as it must be up-to-date. If it is not, then update it immediately.
Get Latest Firmware
Undoubtedly, it is an important factor to consider to get the extender flawlessly working. To perform this process, use your PC and any web browser.
- In the first place, discard the connection between devices and the network.
- Let the PC connect to the extender network to update the software.
- Now, go to the extender’s default web-based setup portal.
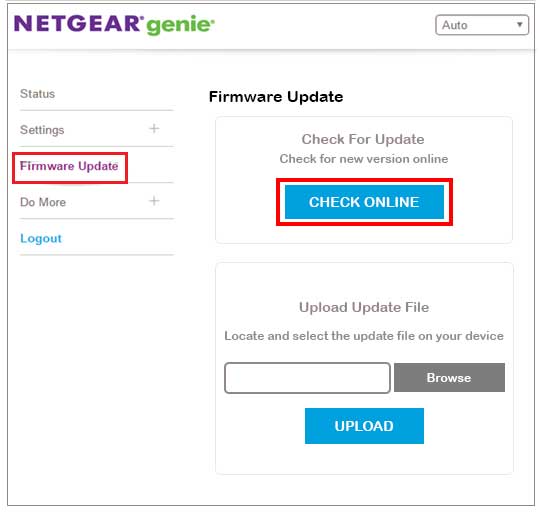
- On that page, click on the See Updates option of the extender model.
- In any case, if there is any availability, then download and save the file.
- After that, select the Firmware Upgrade option on that same page.
- Upload the file there that you downloaded or saved earlier on the PC.
- Once it is uploaded, start the Update process by clicking on it.
- Wait for some time till the extender completes the update process.
- Make sure to don’t turn off the PC or don’t perform other tasks on it.
- When the process will complete, the extender will be required to reboot.
- In the end, power cycle the extender and check its performance.
After following this approach, if the extender keeps working slowly, then don’t think twice to reach our technicians. Indeed, they will help you to get the errors fixed.
Reset Netgear N300 Setup
Surprisingly, the Netgear WiFi N300 extender has a reset button on its panel. Through this, you can discard the default configuration settings to remove the errors in the working.
- Initially, disconnect all the devices from the extender network.
- Find and press the extender reset button until the LED changes color.
- After that, the LED will start blinking, which means the process is going on.
- Therefore, this procedure will be completed in a short period of time.
- Also, the extender LED will become stable after resetting the extender.
- When the LED indicates an optimal sign, proceed with the setup process.
- Thereafter, configure the extender again and make the connection.
To install the Netgear N300 setup, choose any method from the above-mentioned processes. Additionally, create a new SSID and the extender’s password and these must be strong or unique. As this process will delete the settings that you did earlier.
Facing Errors Continuously? Get Help From Experts
We can say that the setup and troubleshooting tips we provided will help you to execute the process hassle-free. However, if you are not getting things clear, then contact us without hesitation. By simply calling us right away at +1 716-992-6371 or mailing us at [email protected], you will reach our experts. Literally, we strive to handle and solve your queries, and in fact, we are a ping away from you!
Common Mywifiext Setup issues
- Mywifiext.net Not Working
- Mywifiext.local Not Working
- Unable to Access Netgear Extender Login Page
- Incorrect Username and Password
- WiFi is Connected but No Internet
- www.mywifiext.net Login Issues
- Can’t Find the Extender Default SSID
- Server Error
- Unstable or Blinking LED
- Mywifiext.net Setup Issues
- Can’t access www.mywifiext.net
- www.mywifiext.net Taking too Long to Load