
Netgear EX7000 Setup | AC1900
Are you experiencing issues while executing the AC1900 Netgear EX7000 setup? No need to worry. Here is the complete solution for you.
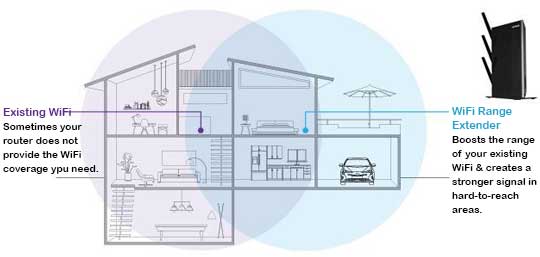
AC1900 Netgear EX7000 is a state-of-the-art whole-home WiFi solution that mainly aims to extend your existing router’s network coverage area. It boosts your router’s speed and performance as well. Homeowners who are bothered by their current WiFi network can opt for this revolutionary home connectivity solution. Netgear claims that this device has the capacity to extend a router’s network coverage area up to 2100 sq. ft. of area. This means one of your family members sitting on the third story of your home can easily enjoy seamless video streaming by connecting to the AC19000 EX7000 WiFi extender which is placed on the ground floor. However, for that, you need to complete a mandatory Netgear EX7000 Setup process. If you are not sure how to do that, we have the solution for you.
AC1900 Netgear EX7000 Setup
Netgear provides more than a couple of options to set up extender devices. The options include WPS configuration, web browser-based setup, and app-based configuration methods. Additionally, Netgear also provides a smart setup option to users which is quite similar to a web browser-based configuration process.
The WiFi-protected setup (WPS) method is the easiest and quickest one. You can finish the complex Netgear EX7000 setup process within 5 minutes by using this method. However, some users may experience certain difficulties while indulging in this setup process. Thus, here we are sharing the complete Netgear extender setup details.
WPS One-Touch Configuration Method Steps
Before getting into the setup process, check if your router has a WPS button on it. Without WiFi-protected setup functionality in the router, you cannot perform the setup using WPS. Also, see if you have an active internet supply in the router from your ISP. Once ensured, move ahead with the following steps:
- Connect the power adapter of the Extender to an active electrical socket.
- Power on your Netgear Extender model.
- Ensure your router is powered on as well and functioning optimally.
- Locate the WPS button at your extender’s rear panel or the bottom of the device and then push it. (the location of the WPS button varies depending on the device mode.)
- Press the WPS button on your router within the next 2 minutes.
- Wait for a few seconds for the WPS LED to get stable and turn green.
After completing all these steps, if you notice a solid green WPS LED on the extender and a stable Device Link LED on the router, the AC1900 Netgear EX7000 setup is completed successfully. Take advantage of extended whole-home internet connectivity now all around your home.
In case the WPS setup fails, you should try it again or use another Netgear setup method. Or you can simply opt for our remote technical support which is the most appropriate option you have. Contact us at +1 408 477 8750 or send us an email at [email protected]. Our support experts will resolve your technical issues quickly.
AC1900 Netgear EX7000 Setup Using a Web Browser
Configuring your Netgear EX7000 extender device using a web browser can be a little confusing for new users. This is because there are multiple steps involved in this and you have to perform this manually from the start to the end. However, since we are here to provide you with the required support timely, you need not worry at all. For now, look below at the step-by-step Netgear EX7000 setup process and try setting up your device on your own. In case you encounter any difficulties, our technical support line is always available to deliver to you.
- An active data network connection
- A router that needs to be extended for a better connectivity
- A Netgear AC1900 EX7000 Extender device
- An ethernet cable for wired connectivity
- A client device that can be connected to an internet connection like a computer, laptop, or smartphone
- Netgear account login credentials that you may find within the EXtender’s packaging
Netgear EX7000 Web-Based Setup Steps
- First, ensure your router is plugged in and it has an internet supply from your ISP.
- Connect the extender node to an active power outlet using the power cable.
- Switch the power button on and wait until the Power LED gets stable and turns solid green.
- Boot up your client device and go to its WiFi setting.
- Find out the NETGEAR_EXT. SSID from the available network list and then connect to it.
- Once your system is connected to the internet, go to your favorite web browser.
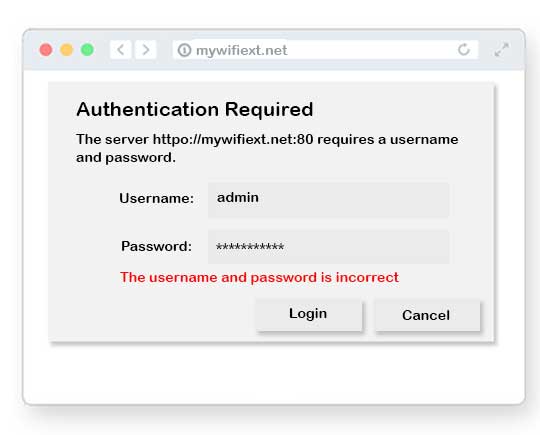
- Enter mywifiext.net or the default IP address of the Netgear on the search bar (a “New Extender Setup” will open up on your device screen).
- Take your cursor at the “New Extender Setup” button and then click on it to enter the next page (a new account creation page will display).
- Fill in the information as required in the blanks to create an account. This account will be for Netgear EX7000’s GUI credentials recovery.
- Select the “WiFi Range Extender” option on the next screen. If you are reluctant to extend your Access Point, you need to select the “Access Point” option instead of “WiFi Range Extender.
- Now, locate the Router’s network that you wish to extend from the available network list. There will be two boxes on the screen including 2.4 GHz and 5 GHz. Uncheck the frequency band that you do not wish to extend or keep the boxes checked if you wish to extend both bands.
- Enter your security key on the next screen
- Set a new username and password for your Extender WiFi network or use the existing credentials.
- Connect your client device to the extended network.
- Lastly, complete the registration step. You can do it later as well.
Post-Netgear EX7000 Setup Steps
After completing all steps that we have mentioned above, you are all set to use an extended data network all across your home. However, you require to complete a few post-setup steps that are as follows:
- Power off and unplug your Netgear extender.
- Take your Netgear EX7000 Extender device to a new location where data signals are strong.
- Place it somewhere off the floor and away from metal objects and electronics.
- Ensure the router is not too far from the extender.
- Power on the extender again, connect it to your device, and start enjoying the seamless internet connection at every corner of your home.
Netgear Nighthawk or Genie App-Based Setup
Setting up AC1900 Netgear EX7000 is also possible using a Netgear Nighthawk or Genie app. It is a smart way to set up a Netgear extender device. While using a Netgear app for setup, you simply need to follow a similar process as we have mentioned under the web-based setup section above. If you have any confusion regarding the same, you can check the user manual or contact our dedicated Technical Support team right away. You can readily reach them via voice or email. Dial +1 408 477 8750 on your phone or write to us at [email protected]. We will reach out to you in the least possible time.
Some Common Netgear EX7000 Setup Issues and Their Solutions
Users frequently experience a number of issues while setting up their Netgear EX7000 Extender devices. We get queries for the same daily at our mailbox. We do not ignore them but reach out to the users and strive our best to provide them with the most appropriate and affordable solution.
For your convenience, we have listed down some most common Netgear extender setup errors and their effective solutions. Find them out below:
Common Netgear EX7000 Setup Issues
- The network frequently gets disconnected
- No internet shows up
- The device is connected but the internet is not working
- Unable to connect to the extender’s SSID NETGEAR_EXT.
- The router fails to connect to the extender
- Incorrect password or username
- Unable to load the Netgear login or setup page
- The IP address or web portal link doesn’t redirect to the correct page
- The device Link LED is unstable on the router
- The connection LED is blinking for too long on the extender
- Incorrect IP address or wrong web login portal link
Best Solutions to Fix Netgear Extender Setup Issues
- Restart the extender
- Plug out and then plug in again the extender after a few minutes
- Take the extender to a better network place within your home
- Update the firmware
- Change the settings of the extender using the mywifiext.net portal
- Factory reset the extender node to the default settings
- Adjust the external antennas of the device
- Get a new set of high-gain antennas for the extender
- Try switching from 2.4 GHz to 5 GHz frequency band
- Replace the cut or bruised ethernet cable with a new one (if you are using a wired connection)
These simple troubleshooting steps would most likely work for you. However, if the problem persists for a long time, you should reach out to us right away without delaying much. Our team of technical support professionals will assist you in resolving all sorts of issues.
Netgear Extender Factory Reset Process
A factory reset process sets the extender to its default setting. It deletes all data like username, password, security settings, and network name. You should try this step when nothing works for you.
The steps you need to follow to factory reset your extender device are as follows:
- Attach the extender’s power cable to a power socket
- Power on the device
- Locate the “Reset” button either on the rear panel or the bottom of the node
- Press it and hold for up to 10 seconds until the reset LED stabilizes
That’s all. Your Netgear EX7000 extender has been reset to the factory default setting successfully. Now, you may not face any Netgear EX7000 setup issues again.
Get in Touch to Acquire the Right Setup Solution Now
When nothing works or your frustration with the Netgear EX7000 setup continues, we deliver the solution directly to you. Our technical support experts are responsible for that. Reach out to them by dialing +1 408 477 8750 on your phone or writing to us at [email protected]. We will provide you with the most appropriate and affordable solution to you remotely.
Common Mywifiext Setup issues
- Mywifiext.net Not Working
- Mywifiext.local Not Working
- Unable to Access Netgear Extender Login Page
- Incorrect Username and Password
- WiFi is Connected but No Internet
- www.mywifiext.net Login Issues
- Can’t Find the Extender Default SSID
- Server Error
- Unstable or Blinking LED
- Mywifiext.net Setup Issues
- Can’t access www.mywifiext.net
- www.mywifiext.net Taking too Long to Load