Netgear EX6120 Extender Setup

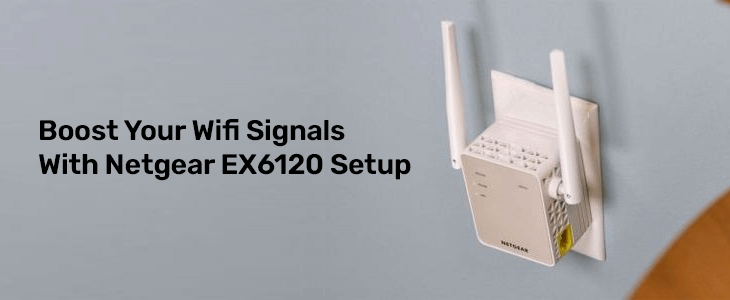
Boost Your Wifi Signals With Netgear EX6120 Setup

Looking for a complete guide on Netgear EX6120 Setup? Here you go. This guide covers it all, from feature set , device description to setup process.

Feature Set

The Netgear EX6120 Setup comes with a variety of features. To begin with it offers dual bands. The 2.4Ghz band provides signals to your far away devices as it can easily penetrate through various physical obstacles. Whereas the 5GHz band provides faster speed. The EX6120 provides speeds of upto 1200Mbps. The high power external antennas provide reliable and wider coverage throughout your abode. Additionally you get an Ethernet port for connecting wired devices directly to the extender. Moreover you can use the Netgear EX6120 Setup in two ways that is in access point mode and as an extender.

Netgear EX6120 Overview

Now as you are familiar with the features of the extender, it’s important to know about other physical aspects as well. So the EX6120 is a simple wall plug designed extender. On its front panel you get four smart LED light indicators. On one side panel you get three buttons. Starting from the top, one is a reset button, WPS button and at last you get Power On/Off button. On the other side panel you’ll find the Ethernet port.

Netgear EX6120 LED Descriptions

For a smooth and quick Netgear EX6120 setup, understanding the meanings of different LED lights is important.

  • Starting with the Router Link LED. This LED light clearly depicts the connection between the router and the EX6120. A solid green light depicts a best connection whereas the red light depicts a poor connection.
  • Moving forward to the Device Link LED. It tells about the connection between your device and the EX6120. Again the solid green depicts a best connection, red light means poor connection.
  • On the power LED if you see an amber light, it means the EX6120 is booting up. When it turns solid green then the extender is ready for use.

Netgear EX6120 Installation Guide

For a successful Netgear EX6120 setup placement of the extender plays a crucial role. So before we dive into the installation steps let’s place the extender strategically.

For best performance place the EX6120 nearby to the host router. Away from electronic and metal objects. Some common examples are fish tanks, security cameras, cordless phones, microwaves, bluetooth devices, refrigerator and aluminium doors. In between the router and the extender there shouldn’t be any physical barriers like a wall or heavy furniture set. The closeness to the router is important only during the initial setup and not after the Netgear EX6120 setup completes. After the completion you should place the extender in between the router and the problematic area.

Installation Steps

  • As the EX6120 is a wall plug extender, plug it directly to a wall socket. After that, turn it on.
  • Don’t hop onto the next step, until the power LED turns from amber to green. If it doesn’t light up then from the side panel push the On/off switch.
  • After that, gently push the WPS button from the side panel. Do not release it until the WPS LED starts blinking.
  • Immediately take a turn towards the host router and press the WPS button on it as well. After a while you’ll notice the WPS LED on the extender turns into a bright solid green color. The Netgear EX6120 Setup completes when the router link LED also turns solid green.
Netgear Extenders

Boost Wifi Coverage With Netgear Extenders

Netgear provides its users with a vast variety of wifi extenders. Depending on the coverage area and wifi needs you can select any for your home or office. In today’s guide we’ll be particularly sharing the details about the Netgear EX7700 Setup and Netgear AC1900 Setup. Although the setup process for both the extenders is exactly the same, the only difference is in the feature set.

Netgear EX7700 Setup Features

Before proceeding towards the Netgear EX7700 setup process, first lets check out its magical features.

  • EX7700 extender operates on 802.11ac wifi standards.
  • It comes with three frequency bands. The band number one that is 2.4Ghz band, provides speeds of upto 400 Mbps. Whereas on both the 5GHz bands you receive the speeds of upto 866 Mbps.
  • Further the Netgear EX7700 Setup comes with two ethernet ports and that to with auto-sensing technology.
  • Thereafter the high security encryptions are worth considering. In EX7700 you get WPA/WPA2-PSK and WEP security standards.

Installation Guide

As mentioned above the installation process for both the extenders is similar. But we’ll be discussing two different methods one for Netgear EX7700 setup and other for the Netgear AC1900 Setup.

Netgear EX7700 Setup Using WPS Button

Let’s first unbox the extender. Inside you’ll find in total three components. One Netgear EX7700 extender, one power adaptor as per your shipping country and lastly a quick user guide.

  • Now bring the tri-band extender to the same room as your router.
  • First attach the power adapter to the EX7700. After that plug in the power adapter to the electrical switch board. Press the power button and wait for the power LED to turn from solid amber to solid green.
  • Now carefully push the WPS button on the EX7700 extender, you’ll see a blinking white light on the WPS LED. After that press the WPS on the nearby router.
  • Wait as the syncing process takes a few seconds or a minute to complete. A solid white light on the WPS LED informs you that the Netgear EX7700 Setup is successful.
  • Lastly, move the tri-band extender to a desired location. But be cautious as wrong placement won’t provide you seamless wifi experience. Avoid placing it in a closed box, behind heavy furniture or near metal or electronic items.

Netgear AC1900 Setup Using Web Interface

Although you can follow the same above mentioned setup method for setting up an AC1900 extender. But just to provide an alternative we are here with another setup method.

  • Put the extender closer to the router and power it on.
  • Thereafter, pick any smart device from your collection. Use it for building a connection with the AC1900.
  • There are two options. For wireless connection, enable the wifi on your selected device. Choose the correct network name and type in the password. Check the Netgear AC1900 Setup quick user manual for finding the correct information.
  • The second option is more favorable as it ensures a stable and strong connection. So for this use ethernet cable, connect one end to the AC1900 extender and other end to the smart device.
  • As the connection is established, moving further launch any internet browser like Google Chrome, Safari or any other.
  • Now make your way towards the address bar of the selected browser. Therein type the default IP address and then hit the Enter key.
  • Further, fill up the login information and click on the Login button.
  • Now to complete the Netgear AC1900 Setup, start following the web instructions one by one.
  • After completion, move the extender to your desired location, so it can do its job of eliminating connectivity issues and expanding signals.
Netgear EX6100 Setup

How To Setup Netgear EX6100: A Complete Guide

Netgear extenders are widely used by people to extend their router’s signals. EX6100 is the most popular model of Netgear range extender used by people to eliminate dead spots. With the Netgear EX6100 Setup you can boost up your WiFi signals to ensure a strong connection in every corner of your space. Setting up the Netgear range extender is easy. This guide will walk you through the entire process step by step, must read till the end!

Netgear EX6100 Installation

Installation of the range extender hardware device is mandatory before setting it up. Installation process may include following steps:

Unbox the Netgear Extender

Unboxing of the netgear range extender device is the first step of installation. The box of extender might contain following items along with the extender device:

  • Power adapter
  • User manual
  • Ethernet cable

Place the Extender

Placement is a very crucial step. If your placement is not appropriate then you can’t get the best out of the device. So, be careful while choosing the placement. While performing Netgear EX6100 Setup you need to place the device proxy to your host router device. Later on you can again place it to optimize the network.

Power the EX6100

Powering the Netgear EX6100 is important to turn on the device. To power up the device, you need an electric outlet. Connect the extender to power using the adapter you receive along with it.

Netgear EX6100 Setup Process

Now you can initiate the Netgear EX6100 Setup by using the web interface. Check out the steps to move ahead:

Connect To Netgear Network

Prior to initiating the Netgear EX6100 Setup page you need to connect your computer/ laptop with the extender network. Use wifi settings of the device for wireless connection. On the contrary, for wired connection take the ethernet cable to join both the devices ethernet ports.

Access Web Interface

Accessing the web interface will be the next step of the setup process for which you need to launch google chrome or other browser you have. Search for www.mywifiext.net web address to access the admin account of netgear extender. Thereafter use the default admin details to enter the admin panel.

Configure The Extender

Once you get the access to www.mywifiext.net web address, you need to move further to initiate the Netgear EX6100 Setup. Go to the advanced section of the settings and search for setup wizard. Select it to get the guidance on setup. Now the screen will prompt you to enter the host router’s details. Here you have to enter the SSID and password of your existing host network device with which you wish to connect your netgear extender.

Secure Your Extender Network

Create a SSID for your extender network to keep it different from your router’s network. Also secure it with a new password. So, anyone aware of default settings can not access your network.

Finalize The Configuration

Do the other necessary settings including firmware update, admin password change etc. Once your settings are done, select “apply” option to complete the setup.

Disclaimer:- mywifiextlogsetup.com website is for customers who are seeking technical help and technological assistance/support service for WiFi extenders, routers, and WiFi networks. However, we do not have any endorsement, alliance, or affiliation with any brands neither direct nor indirect. All the images, brand names, product models, and logos are only for illustrative purposes. Guidelines provided on the website are solely for informational purposes. Neither a guarantee nor an implied warranty is provided regarding the content available on the website.