
Netgear AX1600 WiFi Mesh Extender Setup
Netgear AX1600 WiFi Mesh Extender Setup is extremely easy and straightforward. One can set up this magical device within minutes. Even those who are not tech friendly can set it up independently. Usually people have a notion that technical gadgets can only be set up by the experts. But the fact is that with the right guidance anyone can complete the process by themselves. So today let’s explore this beast device.
Netgear AX1600 Extender Uses Wifi 6
Firstly, Netgear has taken the game to the next level by introducing the wifi 6 in AX1600 wifi range extender. The wifi 6 means faster speeds, wider coverage and four times more device coverage capacity then its predecessor. So overall you will get seamless wifi coverage in every single corner of your home.
It Provides Faster Speeds
Secondly, the Netgear AX1600 WiFi mesh Extender Setup provides users with super fast speeds of 1.6Gbps. It comes equipped with dual-bands. One 2.4GHz band provides wider coverage and the other 5GHz band provides faster speeds. The combination of both bands together provides you seamless internet experience.
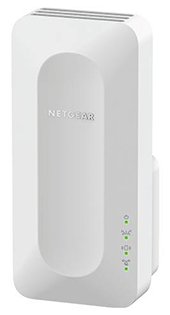
Two Internal Antennas And Seamless Roaming
Further, the extender comes with two internal antennas which firstly means a compact design and better connectivity. Internal antennas distribute signals more effectively than external antennas. Additionally one of the greatest features of the extender is that it provides seamless roaming. It means it automatically connects your devices to the best available wifi.
Gigabit Ethernet Port For Your Convenience
Next, the extender provides users with the flexibility to connect the wired devices directly to the extender. On the side panel of the AX1600 extender you can easily find one gigabit Ethernet port. So whenever you want a stable and fast internet speed for any wired device like smart TV, gaming consoles or any other device then you can connect the device directly to the port.
Smart LED Indicators
Additionally, on the front panel of the extender you get 4 different LED light indicators. Each indicator helps you in understanding the connectivity easily. With this feature it becomes extremely easy to properly set up the extender. It not only saves your precious time but also helps you in using the extender properly. The four LED indicators are Power LED, Router Link LED, Client Link LED and lastly the WPS LED.
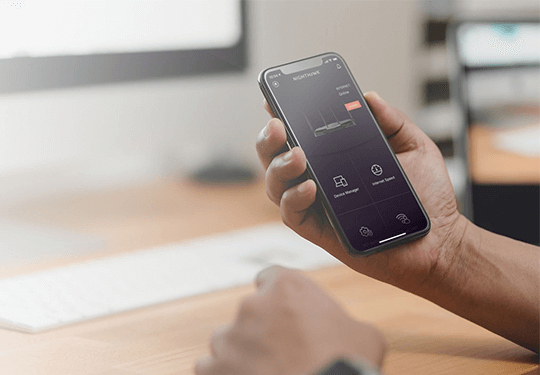
Extremely Easy Setup With The Nighthawk App
As we said, Netgear AX1600 WiFi mesh Extender Setup is extremely easy. Here’s how you can set it up within minutes.
- Firstly, place the range extender in the same location as your host router. Make sure there are no physical obstacles like walls, electrical or metal objects near to the router. As it can lead to interference with the signals.
- Secondly, plug in the AX1600 range extender into an electrical outlet. Switch it on. Make sure the supply of electricity is uncut and proper. Now, wait for the power LED on the extender to turn solid green. As solid green light indicates that the extender is powered on.
- Further, take any device of your choice like your smartphone, computer or laptop. Go to its wifi settings. In the list of available networks look for the network name Netgear_EXT. Click on it to connect the device to the extender’s wifi network.
- Now, on the same device, download the Netgear Nighthawk app. The Nighthawk app is available on both The Play Store as well as on App Store. Finally, open the app and start following the on-screen prompts to complete the setup process.
- Once the setup is all done, unplug the extender and move it to a new location. It should be halfway from the router and the area where the connectivity was poor. Plug in the range extender and power it on. Again check the power LED to know if it is working properly or not. Further to check whether the placement is correct or not check the color of the router LED. It should be solid green, in case it is amber or red then move the extender closer to the router. Keep moving until it turns solid green.
Finally, Test The Connection
Lastly, test the connection by connecting your devices to the new network. The new network will have _EXT added at the last. Go to the area where the signals were earlier poor and start streaming anything on the device. Finally, check the client link LED on the extender. If it has a solid green light then it means your setup is completely successful and the connection is best.
Contact Us For Support!
In case of any other query or help you can contact us directly. You can connect to us through phone call, email or live chat. You can easily find the contact details downwards. Our experts are available 24/7. So feel free to connect anytime for every technical help.