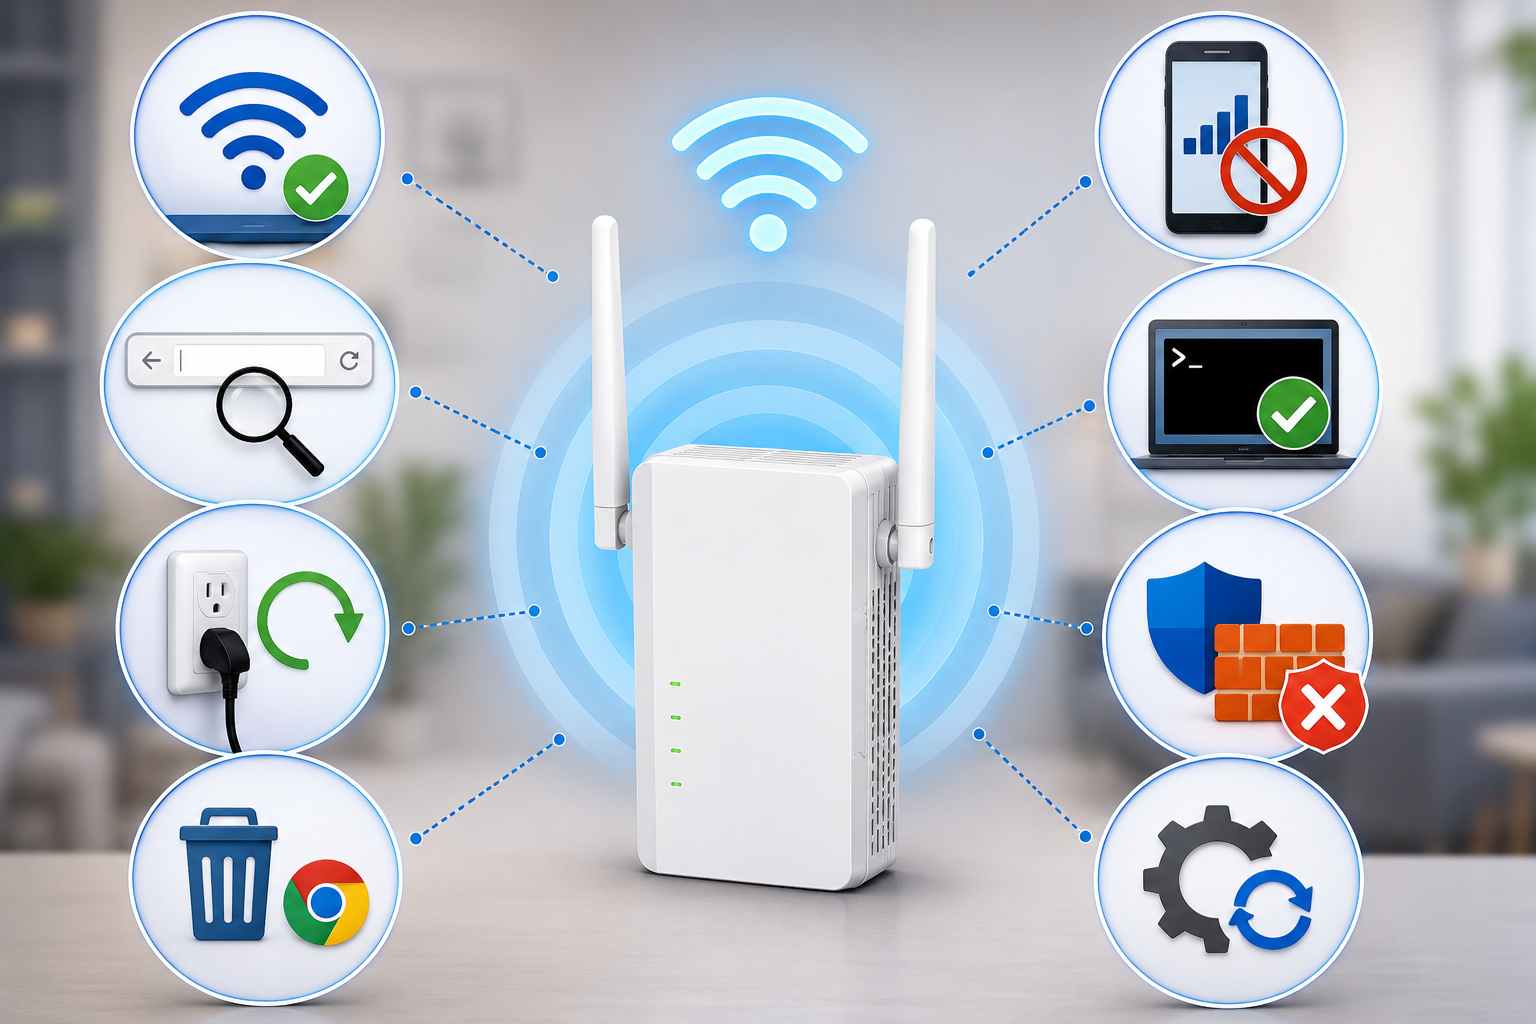
Netgear Orbi Setup A Complete Guide For New Stoner

How To Extend Wireless Coverage Through Netgear EX7000 ?

There is no doubt that the need for wifi connectivity in every single corner of our space is an absolute necessity. As everything from work to entertainment requires high speed wifi connection. This is not possible when you rely solely on the routers. Because routers are meant to cover limited space and can handle few devices only. So if you want seamless connectivity then investing in Netgear ex7000 setup is a practical decision. If you decide to buy one or already got your hands on it then this blog-post will lend you a helping hand in conducting an errorless Netgear ex7000 setup. So without unnecessary delay, check out the steps for the easiest and the convenient wifi protected setup method. 

Setup Begins

First up, unpack the ex7000 package. Inside you’ll find antennas and your ex7000 signal booster. Remove the cap of antennas. Thereafter connect them to the signal booster’s connector. Turn them clockwise to attach them properly. 

✓ Activate The Signal Booster 

After you properly attach the antennas, take the extender into the same area as your router. Now link the ex7000’s power adapter to the wifi signal extender. Thereafter connect it to the switch board. Turn it on. Now the Netgear ex7000 setup requires a few minutes to start up. So allow it that time. 

✓ Connect 

Moving further, it’s time to push the extender’s WPS button. Once you do it, the link rate LED as well as the device to the extender LED light lights up. As you see the glowing light, press the router’s WPS button. After the configuration completes, the 2.4GHz link rate LED turns green. It indicates successful Netgear ex7000 setup

Now if your router supports 5GHz band then to extend its coverage, repeat the above written step again. With this your 5GHz link rate LED will also light up. 

✓ Relocate The Netgear EX7000 Setup 

After proper synchronization you can unplug the ex7000 and place it more thoughtfully to eliminate the dead zones. You should plot it halfway from the router and the area with connectivity issues. The area that you choose must receive more than forty percent signals from the router. Because effective and seamless communication between the router and ex7000 is extremely crucial for the signal booster to work in your favor. Additionally, plot the Netgear ex7000 setup away from metal and electronic objects. As these objects can create a hurdle in proper working. 

As you plot the ex7000, replug it and turn it on. All the front interface lights should glow green. If you see a red indicator on any of it then it suggests poor connection. In that case you need to reposition your ex7000 more strategically. Keep repositioning it until the indicators glow green. 

Finally, fetch your smartphone. Link it to the new network. Your new network identity is similar to your router’s SSID; it just has EXT at its end. The security key also remains the same. Lastly, test the connection by streaming any high definition content. 

Netgear EX7700 WiFi Extender

How to Set Up Netgear EX7700 WiFi Extender Easily?

With Netgear ex7700 setup you can easily extend the wifi coverage of your existing router. Thus eliminating all the dead zones and other connectivity problems like slow speeds, intermittent internet connection, signal drop and other issues of similar sort effectively. So in this blog post we’ll be sharing the complete insights about the Netgear ex7700 signal booster. The guide will contain easy installation steps alongside extender’s features. So without any more delay let’s begin with the product features.

Netgear EX7700 Setup Highlights 

First up the ex7700 range extender functions on tri-bands alongside FastLane 3 technology. The amalgamation of both offers super-fast and dependable wifi speeds. Moving further the signal booster allows for seamless roaming. It means even when you are moving around in your abode your device won’t lose connectivity even for a second. Next up, with the Nighthawk app, Netgear ex7700 setup as well as management of the device becomes super convenient and easy to carry out. Additionally, the signal booster supports ethernet ports (two). It means you can connect external gadgets straight to the extender via ethernet cable. This ensures stable and dependable connectivity. Lastly, with the WPA/WPA-2 PSK and WEP security standards your network and device remains shut for the hackers. 

Quick Configuration 

The steps for Netgear EX7700 setup are surprisingly easy. So start off by collecting the package items. Inside the box you get your ex7700 signal booster, a power adapter and a quick user manual. 

Now pick your range extender and plot it in a central area. Here the central area means place between the router and the problematic area (dead zone). Try plotting the booster away from unnecessary physical obstructions like furniture set, electrical and metal objects and barriers like thick glass or concrete walls. Thereafter, pick the power adapter. First link it to the ex7700’s power port. Thereafter move it into a well working switchboard. Turn on the power button. Let the signal booster boog up properly. 

Moving further, in this step of Netgear ex7700 setup you require a smart gadget. It can be your laptop, computer system, iPad, tablet or even your smartphone will work. Now connect it to the ex7700 using ethernet wire. Alternatively you can connect wirelessly using the details written on the ex7700’s bottom panel. 

Once connected, open the internet browser. Try to choose between Internet explorer, chrome, firefox, safari or edge. As all five of them are compatible. In addition to it, you need to ensure the chosen browser doesn’t have any pending updates, as this will lead you towards errorless Netgear ex7700 setup

Now in the URL column fill up mywifiext.net. Press Enter. Sometimes the mywifiext.net doesn’t work so in that scenario consider 192.168.1.250. Thereafter fill up details. The accurate defaults are written in the quick user guide. Generally it is:

  • Username: admin
  • Password: password 

After you complete the login steps, select the current network’s SSID. Input the password. Tap on Connect. Thereafter adhere to the remaining interface directions and wrap up the Netgear ex7700 setup successfully. 

How To Carry Out Netgear AX6000 Setup Seamlessly

How To Carry Out Netgear AX6000 Setup Seamlessly?

Who doesn’t enjoy uninterrupted and high speed wifi connectivity in their home or office space? Surely everybody does. One such masterpiece from Netgear that has become immensely popular is Netgear ax6000 setup. It is a dual-band router that allows the user to work, stream and browse without any lag or buffering. So if you also got your hands on this particular device from Netgear, then in this blog-post you’ll get the complete insights about its setup process. Many users believe setting up networking devices means taking help from the experts, but all you need is right step-by-step guidance. So, without further ado, let’s move straight to the main agenda that is conducting errorless Netgear Ax6000 setup.

Installation Guidance 

For any networking device to work properly, its placement plays a crucial role. So plot the AX6000 device thoughtfully. You should plot it in the center or where most of your gadgets like computer system, laptop, cell phones operate. Additionally, keep it away from metal and electronic items such as microwaves, aluminium doors, bluetooth devices, fish tanks and also away from the thick concrete walls. Moreover, plot it in an open space and try placing it on a higher elevation like a table or on the shelf. Now after considering all these placement strategies you are all ready for the errorless Netgear ax6000 setup

  • Setup Steps

✓ First take out all the contents from the package. Inside you’ll find the ax6000 router, an Ethernet wire and a power adapter. 

✓ Now, link the coaxial cable to the AX6000. Thereafter link the power cord. Now move the adapter into a switch board. Turn it on. Wait till the online LED on the AX6000 turns white. This can take about 10 minutes.

✓ Moving further, in this step of Netgear ax6000 setup, you require a laptop or you can also use a computer system and cellphone as well. 

✓ So now the task is to link the AX6000 to the laptop or your particular device. For this you require defaults. These are written on the ax6000 device itself. So after you note down the defaults, turn on wifi. From the list choose the network name. Input password. Tap on Connect.

✓ If you find the above written linking method difficult or full of hassle then there is an alternative as well. It is using the ethernet wire directly. 

✓ Now on the networked gadget launch Google Chrome. You can use other compatible browsers as well, like internet explorer, firefox, safari and edge. Thereafter, head to the address field. Fill up routerlogin.net. Press Enter. If the page fails to load, then use the alternative. It is 192.168.1.1. 

✓ Finally, you just need basic ISP information like account mobile number, password, username and account number. After you agree to terms of use, just adhere to interface instructions one by one. You’ll be prompted to fill up basic information that you just collected. So do the needful and your Netgear ax6000 setup completes. 

Netgear EX6400 Setup Guide

How To Configure Netgear EX6400 Using Web

Are you tired of facing slow internet pets in certain areas of your home or office? WiFi dead zones can be frustrating, especially when you are trying to stream videos, work ever, or attend video calls without interruption. That’s where a WiFi range extender like the Netgear EX6400 comes into play. Designed to expand your network’s content, this binary- band AC1900 extender helps exclude dead spots and delivers strong, dependable signals indeed in hard to reach corners. One of the stylish ways is how simple it’s to set up. In this post, we’ll guide you through the Netgear EX6400 setup process using a web cybersurfer. Whether you are a tech freshman or an educated stoner, following these ways will help you complete the configuration in no time.

Plug in the Netgear EX6400

To begin the Netgear EX6400 setup, plug the extender into a power outlet close to your main router. Stay until the Power LED lights up solid green.However, press the Power button to turn the device on, If it does n’t.

Connect to the Extender Network

On your computer, smartphone, or tablet, go to the WiFi settings and connect to the extender’s dereliction SSID, which appears as NETGEAR_EXT. No word is needed at this point.

Access the Setup Portal

Use a cybersurfer and type http://mywifiext.net or 192.168.1.250 in the address bar. Press Enter to reach the extender’s configuration page.However, make sure you’re connected to NETGEAR_EXT and try again, If the runner doesn’t load.

Set Up Admin Credentials

The first time you pierce the setup gate, you will need to produce a username, word, and set up security questions. These details will be used to manage your Netgear EX6400 setup in the future.

Begin WiFi Range Extender Setup

After logging in, choose the WiFi Range Extender option. The extender will overlook nearby wireless networks. Elect your WiFi network from the list. You might see both 2.4 GHz and 5 GHz options. Enter your current WiFi word to connect. Next, you can brand the extended networks or keep the suggested SSIDs. Click Next to continue.

Finalize the Setup

Once connected to your network, the extender will apply the settings and reboot. After a successful reboot, go to your device’s WiFi settings and connect to the new extended network. Use the same word as your main router. This marks the completion of your Netgear EX6400 setup via web cybersurfer.

Position Your Extender

Open the EX6400 and dislocate it to a position halfway between your router and the area with weak signal. Plug it into a power outlet and stay for the signal LED. A green LED indicates a strong connection with your main router.

Conclusion

Completing your Netgear EX6400 setup using a web cybersurfer is easy and takes just a few minutes. By extending your WiFi range, you’ll enjoy better internet performance across your home or office. However, reset the extender and repeat the setup process from step one, If you witness issues. If you face any problem with Netgear EX6400 setup then connect our tech team for help on below specified contact number.

Netgear AX1800 Setup Guide | Nighthawk App & Web Method

How to Set Up Netgear AX1800: App & Browser Method

Netgear provides its users an ample number of options when it comes to routers. One such masterpiece is Netgear ax1800. So if you also got your hands on it then carrying out the errorless Netgear ax1800 setup process is crucial. A slight mistake in the initial setup won’t let you use the router optimally. So to help you with the same, in this blog post we’ll be sharing two different router setup methods. One offers a more direct and quick approach whereas the other one is done using a traditional web browser method. No matter which Netgear ax1800 setup option you pick, both offer complete reliability. 

Setup Using Nighthawk App

The process for app based installation is as follows:

First up connect the basic hardware. For the same, collect all the package articles. Now fetch an Ethernet cable. Link it to the modem. Thereafter link it to your AX1800 router. Moving further, connect the power adapter to the AX1800’s power port. Then plug it into a well working power outlet. Turn it on. In case the router doesn’t start up, then push the On/Off switch on the router towards the On position. Now allow the router to start up properly. You’ll get an indication through power LED as to when the device is ready for the further Netgear ax1800 setup process. 

Heading forward, fetch your smartphone. Activate its wifi. Connect it to the network that resonates with the one written on your AX1800’s bottom panel. Now open the Nighthawk application on your cell phone. Ensure the app is operating on its up-to-date version. Users who do not have the app on their cell phone can easily install it down from Google Play Store/Apple App Store. Finally, wrap up the Netgear ax1800 setup, by fulfilling app instructions one by one. 

Setup Using Web Browser 

There are users who do not prefer installation of any application on their cell phones unless it is necessary. The reasons could be less space, security concerns or any other reason of similar nature. So the alternative for the above Netgear ax1800 setup method is using an internet browser. The steps for it are:

  • First connect the hardware similarly as written in the above app based setup method.
  • Thereafter, fetch your laptop. After linking it to the wireless network of AX1800, open an internet browser. As an alternative you can link your client device to the AX1800 via ethernet wire.
  • Now in the browser’s URL field enter http://www.routerlogin.net. Press Enter. Fill up basic information. In the username column goes admin. Whereas in the security key is “password”. Tap on Login.
  • Finally, move to the Advanced > Setup Wizard option. Now all you need to do is, follow each and every direction that is given by the interface. Do not skip any step if you want the Netgear ax1800 setup outcome to be successful and free of errors. 
  • Lastly, do not logout without installation of pending updates if any. 
Netgear EX3110 Setup & Network Settings Using Web

Netgear EX3110 Setup & Network Settings Using Web

Netgear EX3110 is a range extender unit with a compact design. This unit features dual band functionality. It delivers a combined speed of up to 750 Mbps. The extender utilizes FastLane Technology to boost overall performance and improve network efficiency.. To extend network signals, external antennas are provided for improved signal strength and wider coverage, perfect for eliminating dead zones. Netgear EX3110 setup is simple for most users to handle on their own, especially with the help of the mywifiext.net setup portal. Once you add the unit into your existing network, you’ll enjoy an uninterrupted, reliable internet experience. Don’t forget to explore the network settings after setup.

Customizing the network settings allows you to fine-tune performance for optimal results. Whether you’re gaming, streaming, or just surfing the web, Netgear EX3110 ensures seamless connectivity. Follow the step-by-step process outlined below. This easy to understand guide helps you know exactly what to do and when. So, what are you waiting for? Scroll down and get started.

Netgear EX3110 Setup Steps

Protest off the mywifiext.net setup process by installing the netgear EX3110 extender device. Here are the steps you need to follow for the installation process.

  • Unload the EX3110 wireless range extender device. Check out the box has an extender device along with the stoner companion and ethernet string.
  • Secondly, search for an ideal position to connect the extender with the wall outlet. For the placement of the device a separate place is n’t needed as it’s a wall draw device.
  • The third and final step of installation is to power it on.
  •  When placement is decided, turn on the electricity force to the extender.

When installation of the device is done duly the stoner can move further and step towards web configuration. Prior to beginning make sure the device is boggled up.

  • Use a computer or laptop to begin the mywifiext.net setup process.
  • Establish a link between the computer/ laptop device and your netgear EX3110 device using line or wireless.
    • For wired connection ethernet string is demanded. fit the ethernet string into the ethernet anchorages of both the bias.
    • For wireless connection use the wireless network name and word as predefined on the device marker.
  • Browse mywifiext.net web address using a web cybersurfer similar to google chrome, internet discoverer or any other.
  • Mywifiext.net setup page appears on your screen. 
  • Enter admin in the username field and the password in the password field.
  • Tap on the login button to get access to the Netgear EX3110 Setup runner.
  • Netgear installation adjunct will now help you to set up the device.
  • Follow the instructions and choose the host router network.
  • Proceed with the setup process by entering your existing network’s security key.
  • Link the bias and also to keep your network secure produce SSID & word for extender.
  • Also change the admin account information.
  • Update the firmware and finish the setup by clicking save option.
  • In the end, don’t forget to relocate your Netgear range extender to an optimal position for the best signal coverage.

Netgear EX3110 Network Settings

Netgear EX3110 range extender device network settings are super easy with the access of mywifiext.net setup runner. Using the setup runner anyone can accessibly manage to do changes in the network. Check out then what kind of changes you can do in the network

View Connected Device

When you have access to the setup runner, you can fluently check the connected device details with your range extender network. likewise, you also can limit the number of connections with the extender network. Simply go to the menu and also choose Connected bias under settings head.

Boost Video Streaming With Fastlane Mode

With the fastlane mode your range extender will get connected to the router device using one band and through another band it gets connected with your device. To make changes in the fastlane settings you need to pierce the setup runner, rush to settings and also look for the FastLane option under do further.

View WiFi Settings

To view the wireless settings you need to pierce the settings using the login runner and also rush to wireless option under menu. Also you can make changes in the network name and word too.

Firmware Update

Updating the extender’s firmware is crucial for maintaining optimal security and performance. You can check for updates directly through the mywifiext.net setup runner. If a new interpretation is available also the installation adjunct will guide you to install the streamlined interpretation. Firmware can be updated manually as well.

Conclusion

I rest my words by saying that the netgear EX3110 wifi range extender device configuration process is super easy especially when you do it with mywifiext.net setup runner. You do n’t need to have specialized moxie to perform the setup. Simply dive into the below specified breakdown of the process. Don’t sweat indeed if you’re wedged nearly while recycling the setup. Contact the technical team for assistance in resolving the issue effectively.. Whether you are streaming, gaming, or just browsing the web, a duly configured extender ensures you to stay connected without interruptions.

Troubleshoot mywifiext

Multiple Solutions To Troubleshoot mywifiext.net Login Issue

The mywifiext.net is a default address through which users can easily login into their Netgear wifi signal booster. Login is crucial for various purposes like for initial setup, for troubleshooting different problems pertaining to the extender, for customizing different settings and much more. Now usually most users report the problem regarding the working of mywifiext.net address. There can be multiple reasons as to why the web address is not working. So if you are also facing a similar issue, then check out this whole troubleshooting blog post. By the end of it, we assure you your problem will definitely be solved. 

Use The Alternatives

First up, when mywifiext.net login address doesn’t work, you can use the alternative login credentials. These are:

Note: Remember these web addresses won’t work if there is even a slight typing mistake like using upper letter case or giving unnecessary space in between. So you need to ensure complete accuracy. Moving further, the device that you are using for accessing mywifiext.net should have access to the internet. Additionally, it should have its connection to the extender’s wifi network or via ethernet wire. If you are not connected then for wireless connection you can fetch the accurate details from your extender’s bottom or back panel. Thereafter using the same credentials get your device connected to the signal booster. For wired connection you just need to link one side of the ethernet to the client device and the second side to the Netgear signal booster.

✓ Clear Up Browser Problems

Yet another reason why mywifiext.net is not working could be because of choosing an incompatible browser. So to eradicate the same, consider choosing between Google Chrome, firefox, safari, edge or internet explorer. Additionally, clear up browser’s caches and cookies. Moreover ensure the running of the browser on its latest firmware version.

How To Conduct Netgear AC1900 Setup Using WPS And Web Browser

How To Conduct Netgear AC1900 Setup Using WPS And Web Browser

Netgear offers a vast variety of wifi range extenders. No matter which particular model you choose, it will effectively eradicate all dead zones and thus will provide you with seamless connectivity. But to fetch this performance, conducting an errorless setup process is mandatory. So in this blog-post we’ll be sharing the complete details about the Netgear ac1900 setup. You’ll get access to two different setup methods. One is done using the WPS button. Whereas the other one offers a more traditional approach and is done using an internet browser. So let’s check out the guidance for both the methods.

Netgear AC1900 Setup: Using WPS Button 

For the setup first you need a router that has its connectivity to the internet source. Next up, write down the credentials of your network whose reach you are looking forward to extending using AC1900. Now you are all set for the Netgear AC1900 setup steps.

✓ First, plot the AC1900 in the same area and probably close to the router. 

✓ Next up, ensure the mode switch button of the device is turned towards Extender. 

✓ As the AC1900 device comes with a direct plug-in device so you do not need any power cord for its activation. So directly plug the AC1900 wifi repeater into the wall-socket. Turn on. 

✓ To avoid issues with the further Netgear AC1900 setup steps, do not move to the next step until the light on the extender turns green. 

✓ Now press the WPS button of AC1900. When the WPS light starts blinking, press the same button (WPS) on the router. 

✓ Finally, you need to wait for the synchronization process to complete.

✓ As it completes, all the LEDs on the AC1900 should be green. It indicates a successful setup. 

✓ Finally, you can reposition the AC1900 to a location where you want to erase dead zones and other connection problems. 

Netgear AC1900 Setup: Using Web Browser 

The web browser based setup method is more convenient for users who are tech-friendly and want to configure the AC1900 extender deeply. The steps for the same are:

✓ Plot the AC1900 halfway from the router and the area of concern. Remember the placement spot should be able to receive not less than 50 percent signals from the router. Because communication between the router and AC1900 is important for successful Netgear AC1900 setup

✓ Moving further, turn on the device. Allow it to start up properly. Once it activates, take your laptop. Enable its wifi. From the list pick Netgear_EXT. Tap on Connect. As an alternative to this connection method, you can link the device using ethernet wire. 

✓ Now, on the networked device, open the internet browser. Head to the address field. In it type www.mywifiext.net. Press Enter. 

✓ Finally, to wrap up the Netgear AC1900 setup, all you need to do is go through the on-screen prompts one after the other. Do not skip any step and before log out remember to save all the settings. 

Netgear Wifi Range Extender?

How To Set Up Netgear Wifi Range Extender?

There is a notion about setting up networking devices. The notion is that it requires assistance from experts. But the fact is, you just require the right guidance and thus you can easily complete the installation on your own. So if you got your hands on the wifi signal booster from Netgear then in this blog-post we’ll be sharing the complete guidance about mywifiext.net setup. So you can easily eliminate all the connectivity issues effectively with your Netgear device. The setup steps are straightforward so it won’t take more than ten minutes for the entire setup. 

Position The Extender Strategically 

The first step for mywifiext.net setup is thoughtful plotting of the signal booster. Placement plays a crucial role in the performance of your range extender. So plot it in the middle of the router and the area of concern. Additionally, to let the signals travel without any interruptions, keep the signal booster far from electrical, metal and other physical barriers like furniture and thick walls be it of glass or concrete. Try plotting the signal booster on some high elevations. Like you can place it on the shelves or on the table top. Also choose the area that offers proper ventilation. Now you are all set for the configuration.

mywifiext.net Setup Steps

  • Firstly, fetch the power cord of the extender. Link it to the power port. Thereafter move it into a well-working switchboard. Turn it on. If the signal repeater doesn’t start up, then push the on/off switch on the Netgear extender. Thereafter hold on till you see the power LED turning stable and all lit up. 
  • In this step of mywifiext.net setup you require a well updated smart device like a laptop. Activate its wifi. Choose SSID “Netgear Extender Setup-XXX”. Tap on Connect. Users who wish to have a more stable connection can use the ethernet wire. 
  • Moving forward, on the networked device open internet explorer. You can use any other browser as well. Like Google chrome, firefox, safari and edge. Just ensure the chosen browser doesn’t have pending updates and for errorless mywifiext.net setup clean off browser caches and cookies. 
  • In the URL bar enter mywifiext.net. Click enter. If by any chance you are not taken to the login window then use an IP address instead. It is 192.168.1.250. 
  • Finally, you need to fill up the defaults. Usually it is:
    • Username: admin
    • Password: password
  • As you tap on Login, the interface begins searching for the router’s network. As you see it, select it and thereafter fill up the accurate security password. Once the network is extended, wrap up the mywifiext.net setup by personalizing various settings. 
  • Do not leave the setup page without checking for pending firmware updates. Because then the setup outcome won’t be favourable. You might face various issues. Updates rectify the problems and also enhance the security. Therefore installation of updates is crucial for a seamless networking experience.


How To Setup Netgear AX6000 Using Web Browser

How To Setup Netgear AX6000 Using Web Browser

Netgear AX6000 wifi router is totally worth the investment. As it provides ultra-fast speeds of upto 6Gbps. Its MU-MIMO technology allows multiple users to stream HD content without any lag and buffering. Further with the availability of not just one or two but multiple ethernet ports users can easily connect smart peripherals directly to the router. Moreover Netgear AX6000 setup is also extremely easy which is done using an internet browser. Additionally the Nighthawk app helps with easy management of the network. So if you also got your hands on Netgear AX6000 wifi router, then here is the complete setup guide with simple and easy to follow steps. 

Netgear AX6000 Setup Guidance 

Start the setup process by first unboxing all the package contents. You receive three major things. One is your Netgear AX6000 modem router. Next is its power adapter. Lastly, an Ethernet wire. Now follow these simple steps:

  • Turn off existing modem as well as router if any. 
  • Now connect the coaxial wire to the Netgear AX6000 device. 
  • Thereafter fetch the power adapter. Connect it to the modem router. Then to the rightly working electrical power board. Turn it on. The bright white light should show up on the router. 
  • In this step of Netgear AX6000 setup you require a smartphone or your laptop. Connect it either wirelessly using default information as written on the router itself or through ethernet cable to the AX6000 router. 
  • Moving further, open up an internet browser. Move to the URL field. Accurately type the IP address. It is 192.168.1.1. Press Enter. The alternative to it is router.login.net. 
  • Now agree to terms and various conditions. In addition to it, change the router’s admin information and set up security questions. Finally, activate your Internet service by putting up the right information. Now enjoy seamless connectivity with Netgear AX6000 setup

For any query or assistance consider connecting to the experts. 

Disclaimer:- mywifiextlogsetup.com website is for customers who are seeking technical help and technological assistance/support service for WiFi extenders, routers, and WiFi networks. However, we do not have any endorsement, alliance, or affiliation with any brands neither direct nor indirect. All the images, brand names, product models, and logos are only for illustrative purposes. Guidelines provided on the website are solely for informational purposes. Neither a guarantee nor an implied warranty is provided regarding the content available on the website.