
Netgear AC1900 WiFi Mesh Extender Setup
Are you looking for an easy and straightforward Netgear AC1900 Wifi mesh extender setup process? If yes then congratulations you have landed on to the perfect destination. We will provide you step by step instructions. So without further ado let’s begin.
Netgear AC1900 Wifi Mesh Extender Setup Using WPS Method
This method is extremely easy and very quick. The primary requirement for this method is that your router should support the WPS button. If it does then follow these steps for successful setup.
- Firstly, place the range extender close to your host router.
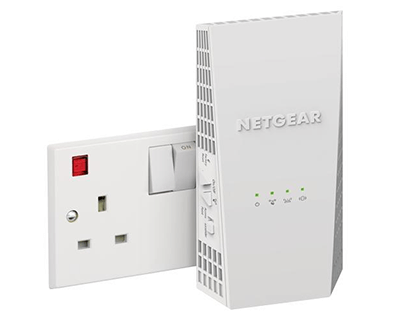
- Plug it in the wall socket and switch it on. Let the extender power on properly. Check the power LED on the extender, as it shows the solid green light move to the next step.
- Next, press the WPS button on the AC1900 wifi range extender.
- Now, Within the next 2 minutes press the WPS button on the host router. The synchronization process will start immediately.
- Further, check the router link LED on the extender. If it displays a solid green light then the connection is successful and perfect. But if it shows a red light then the connection is extremely poor. Follow the instructions again for successful setup.
Note: Placement of the extender is extremely important. So always make sure that during the setup process there is close proximity between the router and the extender. Further, consider removing all the electronic and metal items that are placed nearby these devices. Additionally there shouldn’t be any physical obstacle like a wall between the router and the extender.
- Once the setup is complete, unplug the extender and move it to the middle of your home. Ideally, it should be at an equal distance from the router as well as the area with poor connectivity. Plug in the range extender and power it on.
- Now check the router link LED to see if the placement is proper or not. Try different locations until it turns solid green.
- Lastly, test the connection by using your devices in the area that previously had connectivity issues.
Netgear AC1900 Wifi Mesh Extender Setup Using Web Browser
This Netgear AC1900 Wifi Mesh Extender Setup is also extremely easy. You just need to follow the steps precisely for a successful outcome.
- Firstly, place the wifi range extender near the router. Plug it in and provide it electricity by switching on the power button. Wait for a few seconds or a minute to let the extender switch on properly.
- Secondly, on your client device open wifi settings. In the list of available networks search for the network name Netgear_EXT. First click on it. You will see the option of connect. Click on connect to connect to the extender’s wifi.
- Further, on the same device launch a web browser. Before proceeding further, make sure you clear browser caches and cookies. Now in the browser’s address bar type http://mywifiext.net and press Enter.
- It’s time to follow all the on-screen prompts precisely. Do not skip any step as it will lead to an unsuccessful setup.
- Once the setup is done, you can now move the extender to a new location. Place it halfway from the router and the area where there were connectivity issues. Plug it in and power on. Keep repositioning the extender until the router link LED displays a solid green light.
- Lastly, test the connection by connecting the devices to the wifi network. You will now no longer face the issue of dead zones, poor connectivity or lags and buffering. And that’s all for the Netgear AC1900 Wifi mesh extender setup.
How To Use The Extender In Access Point Mode?
To install the extender as an access point you need to follow these steps:
- Firstly, plug in the range extender into a wall socket. Power it on.
- Now, connect your device to the extender’s wifi network. The network name is Netgear_EXT.
- Further, on the same device open a web portal. Fill up http://mywifiext.net in the browser’s address bar. Click on enter.
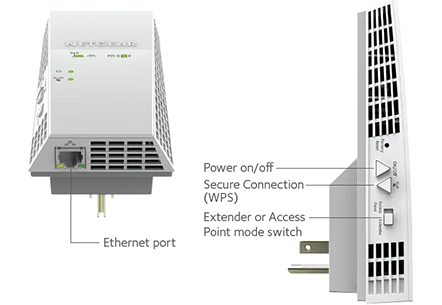
- Next, take an Ethernet cable and connect its one end to the router and another end into the extender’s gigabit ethernet port. You can easily locate this port on the side panel of the extender.
- Lastly, follow all the on-screen prompts to finish the set up. Bow you can easily use the extender in an access point mode.
Contact Us For Help!
If you have any query or need help then feel free to connect to us. You can reach out to us via phone call, by writing an email or through live chat. All the contact details can be found downwards. Further, we provide round the clock support. So you can call or chat with us at any time of the day. Our customer representatives will surely solve all your queries within the limited time frame.