Netgear AC1200

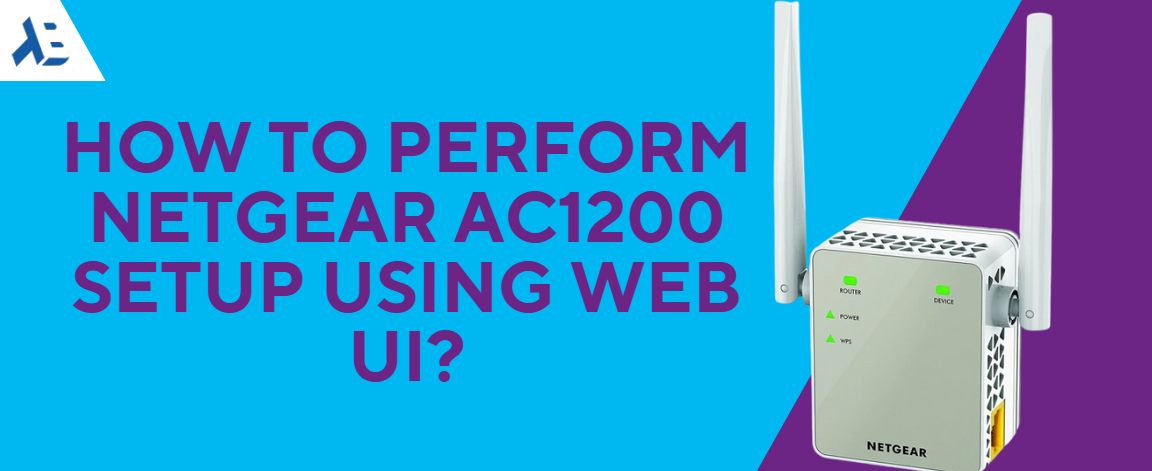
How To Perform Netgear AC1200 Setup Using Web UI?

Netgear AC1200 range extender devices are very popular among the users. The device has the capability to extend the network signals and provide better coverage across your space. With the Netgear AC1200 setup you will no longer face the issue of wifi dead spot areas. Configure your netgear extender device on your own. Gather the detailed information mentioned in the steps further to know what exactly you have to do. Hope this breakdown of the process helps you in setting up the range extender very easily in your home or office existing network.   

Placement Of Extender

Firstly, you have to search for a place to keep your extender. Placement should be within the range of the host route network. Also you have to keep the device closer to the power outlet, so you can easily connect it with power. Further, be sure there should be no network interferer device or object should be present. Keeping the extender proxy to the router during the setup process will help. You can relocate the device after the Netgear AC1200 setup process completes. 

Power Up

Powering the range extender is the next step. If you have a device with wall plug compact design then connect the device directly to the power plug. In case you have the device with a power adapter then connect the adapter to the device. Afterwards connect it with the power outlet. Turn on the power supply and wait till the LED gets turned on. You can proceed further as the LED stabilizes. 

Connect To Extender Network

Proceed further in the Netgear AC1200 setup process by connecting your client device to the extender. You can establish a connection using ethernet cable or wireless network default details. Both the connections are suitable but we advise to go with cable connection for a more secure way. 

Access Web UI

Now you have to access the web UI of the extender. For that you have to follow the following steps:

  • Primarily launch a web browser like google chrome, mozilla firefox or any other. 
  • Afterwards, enter www.mywifiext.net web address in the URL bar to initiate the Netgear AC1200 setup process. 
  • On the opened page you have to mention admin in the username field and password in the password field. 
  • Click on the login option and smart setup will start. 

Configure Settings

Initiate configuration of the extender device by follow the screen:

  • Let the router’s SSID display on the screen. 
  • Choose the right SSID & enter its password. 
  • Thereafter you have to click the continue option. 
  • Now create your new network SSID & password as well. 
  • Follow the setup page and make changes as the window appears. 
  • Once the configuration is done you will reach the final window, here you have to click on finish option. 

Relocate Device

You can easily relocate the device to boost its performance. Look for the new location somewhere in between where your router is placed and the space where you were facing network issues. This placement will help the extender receive signals very easily and amplify them further. Do not keep the extender in corners or closer to heavy metal objects or radio frequency devices as it may interrupt the signals. After relocation it is advised to test the new network using a wireless enabled device. 

Wrap Up

Lastly, I would like to say that Netgear AC1200 setup is a very easy process. Anyone can do the configuration by following the above specified guide. These steps will help in installing the extender’s hardware, adding the extender device to your network and boost the new network as well.

How To Do Netgear Ex6200 Setup?: Step By Step Guide

Looking for a range extender to extend your home’s existing network? Desire to uplift your router’s network to every corner of your home? Confused among various range extenders, which model should you buy? Answers to all such questions are mentioned here “Netgear EX6200”, a perfect range extender. The netgear EX6200 range extender is a dual band device that offers high speed internet up to 1200Mbps through both the frequencies. With the Netgear ex6200 setup you can enjoy seamless internet coverage across your home. Setting up this extender is a simple task which anyone can perform only if they are aware of the process. Further sections of this blog describes the step by step guide of the setup process. 

Installation of EX6200

Installation of the Netgear EX6200 is a very simple process. You have to follow the steps given here to install the device prior to initiating the Netgear ex6200 setup. 

  • Unpack the device and connect the antennas with it. 
  • Afterwards look for a placement to keep the extender. 
  • Once placement is decided, use the adapter to power up. 
  • Wait till the device is LED turned on and get stable. 

Netgear EX6200 Configuration

After the installation of the extender completes successfully, you can initiate the setup process by following any of the given methods. 

WPS Setup- Netgear EX6200

WPS setup of netgear ex6200 is a very simple way to add the device into your existing network within a few minutes. Initiate the configuration by follow the below specified steps:

  • Firstly, press the WPS button given on the rear panel of the Netgear ex6200 range extender. 
  • Within 2 minutes push the WPS button on your host router device. 
  • Monitor the extender LED and wait for it to turn green in color. 
  • If your router supports dual frequency and you desire to extend the second frequency also then proceed with the above specified steps again.

Web Setup- Netgear EX6200

Configuration using the web user interface allows you to customize settings. Check out the steps you have to proceed with:

  • Take a computer/ laptop device & connect it with the extender using ethernet cable or default wifi SSID & password. 
  • Afterwards launch browser & hunt for www.mywifiext.net
  • To get access, enter admin in the username field and password in the password field. 
  • Now, initiate the setup by following the screen guide. 
  • Connect the extender to router & secure your new network.

Conclusion 

From the crux of the description mentioned above about the Netgear Ex6200 Setup, we conclude that the process is very simple. Anyone can add the extender by using the above specified steps very smoothly. In case you encounter any trouble during the setup, you can take help from our technical team. Our team is available on call. You can connect them on the given number. Also you can drop a text message in the live chat section to talk with us directly. We can assist you with the setup as well as troubleshooting the common errors. Don’t hesitate, call now!

No More Dead Zones With Netgear EX6400 Setup

Netgear offers a vast variety of reliable and highly effective range extenders. One such head turner is Netgear ex6400 setup. After its proper installation, users get wider wifi connectivity. This particular range extender comes with a simple wall-plug design. This means no wiring hassles and no extra space for its placement. Further with the mesh technology, wifi signals are present from the front door to the backyard. So the users get to enjoy high speed wifi connection in every single corner of the abode. 


Key Features 

 
The Netgear ex6400 setup comes packed with every feature that is possibly required for today’s modern tech needs. 

First it operates on dual frequency bands. One is 2.4Ghz and the second one is the 5GHz band.

  • Next, users can fetch the speeds of upto 1.9Gbps on both the bands. 
  • Further the high power amplifiers and internal antennas provide wider coverage.
  • Additionally the fastlane technology uses both the bands to provide one single and high speed connection.
  • Moreover with the MU-MIMO technology, users get to connect multiple devices at one point of time. 
  • The Netgear ex6400 setup is compatible with all the standard routers thus no replacements required. 
  • The setup process is extremely easy as it supports one push Wifi Protected Setup (WPS) method. 
  • With the presence of an Ethernet port on the bottom panel, users can establish a reliable and stable connection with wired devices. 
  • Additionally, the repeater supports strong security encryptions to protect the Netgear ex6400 setup from cyber attacks. 

Setup Guidance 


For performing Netgear ex6400 setup process users do not need any tech degree. As the steps for the same are extremely simple and won’t take much time. 

  1. Firstly unbox the package and take out the ex6400 wifi signal repeater. 
  1. Move to the area where the host router is placed. 
  1. Thereafter, plug in the ex6400 into a properly working power socket. Turn it on. Hold on for at least a minute to let the extender boot up properly. See the power LED on the front panel. A solid green light should pop up on it. 
  1. Moving further, on the side panel of the ex6400 there is a WPS button. Push this knob. Hold onto the knob until the WPS LED starts to blink green. 
  1. Next, take a turn towards the host router. Push its WPS knob as well. Now wait for the WPS LED on the Netgear ex6400 setup to solidify into a green color. This can take a few seconds or a minute. 
  1. Lastly, unplug the extender and replug it in a new location. The new location shouldn’t be too far from the host router. To check the connectivity, take the help of LED light indicators. The WPS LED as well as the router link LED should be green in color. If not, then reposition the extender.


As the Netgear ex6400 setup completes you can connect any wifi enabled device. After a successful connection the client link LED also lights up in a solid green color thus indicating a best connection. Whereas a red light on it depicts poor connectivity. Therefore move the client device closer to the ex6400 to reverse red light into green light.

How To Setup Netgear AC1900 Using The Nighthawk App?

Netgear AC1900 is a dual band router that offers high speed internet. Perfect device for stream videos, play games, surf the internet, and connect smart home devices. The device comes with advanced features including amplified antennas, Beamforming+, MU MIMO, Dynamic QoS, Smart Connect, Amazon Alexa Voice Controls, and more. You can connect up to 30 devices simultaneously with the network without reduction in data speed. Netgear AC1900 setup is a very smooth and user friendly process. On this page we specified the step by step process of how you can add netgear AC1900 in your existing network using the nighthawk app. 

Netgear AC1900 Setup App Based

App based setup of netgear AC1900 device is a very simple and smooth process. You can initiate configuration using your smartphone after installing the hardware. For setup and installation you need a smartphone, working internet connection, ethernet cable, power outlet and netgear router with power adapter. Check out the steps and configure your router.

Installation

Installation of the netgear AC1900 device properly is very important to avoid any issue while processing netgear AC1900 setup. For installation you have to follow the given steps:

  • First of all you have to unbox the AC1900 router and place it closer to the modem device. 
  • Then you need an ethernet cable for wired connection between modem and router. 
  • Inject the cable properly and make sure the cable is working. 
  • Afterwards connect the power cable with the router device. 
  • Moving further, connect the power adapter to the power and turn it on. 
  • Wait for the boot-up and the LED gets stable to initiate the configuration.

Configuration

Netgear AC1900 setup includes the following steps. Follow the steps to complete the configuration after installing the device:

  • Initiate the process by downloading the nighthawk app. 
  • Use a smartphone with an android or iOS system to install the app.
  • After installing the app, connect your smartphone with the router’s network. 
  • Use the default details mentioned on the device label. 
  • Thereafter you have to launch the app and start the setup. 
  • Create your netgear account and step ahead as guided on the screen. 
  • Complete the setup and secure your network by creating a separate SSID & password for the router’s network. 
  • Moving to the further step you have to do the other necessary changes like setting parental control, creating a guest network etc. 
  • Update the firmware and finish the setup by choosing the finalize option. 

Testing

After completing the Netgear AC1900 setup you have to test the new network. For testing use a wireless enabled device and connect it with the new network using the new credentials. Thereafter stream videos, play games and surf the internet to check the network. Move around your space even where you were facing issue to check out the coverage. 

Contact Us

In case you encounter an issue then you can connect our technical team for help. Our experts will guide you with the setup process. You can conveniently complete the setup with our help. 

Disclaimer:- mywifiextlogsetup.com website is for customers who are seeking technical help and technological assistance/support service for WiFi extenders, routers, and WiFi networks. However, we do not have any endorsement, alliance, or affiliation with any brands neither direct nor indirect. All the images, brand names, product models, and logos are only for illustrative purposes. Guidelines provided on the website are solely for informational purposes. Neither a guarantee nor an implied warranty is provided regarding the content available on the website.