
Netgear EX6150 Setup
Are you looking for a complete setup guide for your Netgear EX6150 wifi range extender ? If yes, then your hunt should now end as you have landed to the perfect destination. In today’s guide we will share with you the Netgear EX6150 extender’s key feature and its setup process. We will make sure to keep it as simple as possible. So that even those who do not know the basics of technology can also set up this magical device independently. So without further ado let’s start.
Feature Set
Netgear EX6150 Setup comes packed with so many great features. All these features make this wifi range extender the perfect choice for all modern households. So here’s the complete list:
Wifi-Mesh
The Netgear EX6150 with its mesh technology efficiently removes all the dead zones. It effectively covers the wide area of your home. Basically, it creates a mesh of signals due to which every single corner of your home gets drenched with connectivity. Further, with its successful installation you will get lag free browsing and streaming experience.
FastLane Technology
The Netgear EX6150 Setup uses two frequency bands. One 2.4GHz band and another 5GHz band. The fast lane technology uses both these frequency bands to create one high speed connection. Therefore it provides users with super fast internet speeds. Further, it is great for those users who are into streaming and gaming.
Gigabit Ethernet Port
Additionally, the Netgear EX6150 range extender also features a gigabit ethernet port. So you can easily attach your wired devices directly to the extender. This means whenever you want a direct and stable connection for your various devices like smart TV, gaming consoles and much more, you can easily do it with the help of this ethernet port.
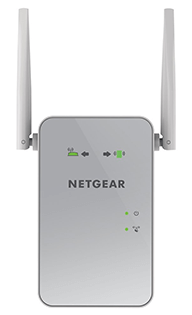
External Antennas
Next, the EX6150 features external Antennas. It means that you get better signal quality and improved wifi range. Even if you want to enjoy the internet from your balcony, terrace or your basement you will get full signals in every single corner.
Smart Roaming
Further, one of the greatest features of Netgear EX6150 wifi range extender is that it automatically connects your various devices like smartphone, computer, laptop, ipad and much more to the best available wifi. So there is no need to choose it manually.
Two Wifi Modes
Yes, you read that right. The Netgear EX6150 provides you the flexibility to choose between two different modes. So, with Netgear EX6150 you can either extend the wifi range or create a new AC wifi access point. You can use it as per your requirements and change the mode whenever needed. Isn’t that great?
Smart LED Indicators
Lastly, it becomes very easy and convenient to set up the extender when it comes with smart LED indicators. The Netgear EX6150 comes with four different smart LED indicators. One router link LED depicts the status of connection between the extender and the router. Further the client link LED depicts the connection between the extender and your devices like smartphone, computer etc. Additionally, when the power LED is solid green it depicts the successful working of the extender. Lastly, the WPS LED helps you in knowing the setup status.
Quick And Easy Installation Process
The Netgear EX6150 Setup is extremely easy and quick, all thanks to the WPS button.
- Firstly, you need to place the extender close to the router. This is essential for the initial setup. Make sure there are no physical obstacles like walls, electronic and metal objects in between the extender and the router. As, it may lead to interference. So once the extender is placed properly, plug it in and power it on. Wait for the power LED on the extender to turn solid green.
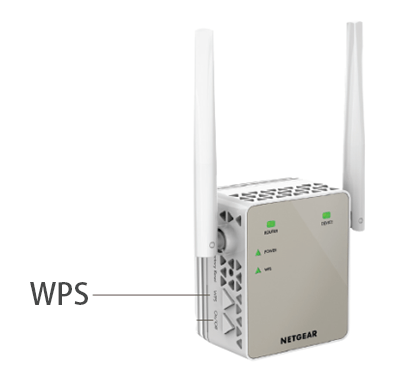
- Secondly, press the WPS button on the Netgear EX6150 extender. As you press the button, the WPS LED on the extender will start blinking green. It means the connection is building.
- Next, within 2 minutes press the WPS button on the router. Finally, the WPS LED and the router LED on the extender will turn solid green thus indicating a successful connection.
- Now, unplug the extender and move it to a new location. It should be placed strategically halfway from the router and the area with poor connectivity. Now plug in the extender and switch it on. Check the status of the router LED if it is flashing a solid green light it means the connection is perfect. Whereas if it is flashing a solid red light then the connection is poor. Try moving the extender closer to the router until the LED turns solid green.
- Lastly, test the connection by connecting your devices to the new network. The new network will have _EXT added at the last. Go to the area where the signals were earlier poor and start streaming anything on the device. Finally, check the client link LED on the extender. If it has a solid green light then it means your setup is completely successful.