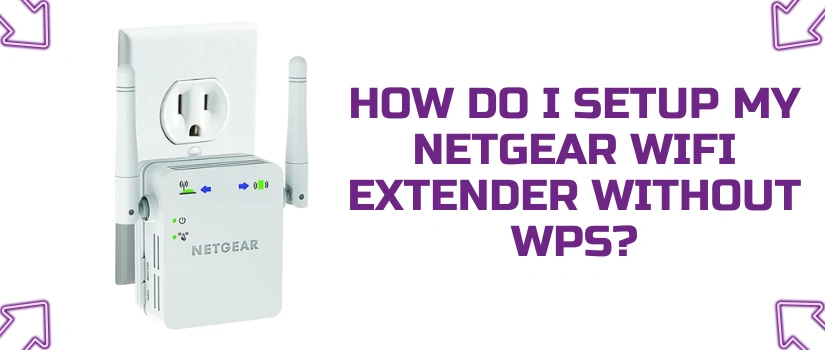
Netgear EX6120 Setup

How To Do Netgear EX6120 Setup In Extender Mode?

Netgear EX6120 is a device that can be set up in extender mode as well as access point mode. Today, in this article we are going to elaborate how to do the setup in extender mode. Netgear EX6120 Setup will not take too much time. Anyone can do the setup with a little knowledge about the process. With the device you can extend your current network and eliminate WiFi dead zones from your space. Our guidance will surely help you with the setup of the Netgear EX6120 device. Read out the further given content of this page to know in detail.

Netgear EX6120 Setup Process

Setting up the device in extender mode can be done through two ways. First method is WPS which is much easier than the other (web) method. Web based Netgear EX6120 Setup will take a little longer time than the WPS method but it allows you to enhance security of the network. Check out the step by step guide to follow in both the methods.

WPS Setup of EX6120

WPS based setup of your netgear EX6120 is quick, easy & straight. Anyone can do it within 10 minutes. Using this method has a drawback, you can’t set a separate SSID & password for your extended network. The same SSID with _EXT will be created automatically as the setup completes. Also you have to use the same password as your existing network has to use the new created network. Steps to proceed with WPS based method includes:

  • Begin the process by powering your new netgear EX6120 device.
  • Thereafter check its LED and when it stables then proceed the setup by pressing WPS button.
  • Hold it for 6 seconds and then release it to move ahead.
  • Next you should press the WPS on your home network device (host).
  • This whole process should be completed within 2 minutes to avoid failure.
  • Wait and monitor the device till its LED turns solid green in color.
  • In case the device LED doesn’t turn solid green or display any other color it signifies the process fails.

Web Setup of EX6120

  • To begin the Netgear EX6120 Setup using this method requires a computer or laptop device with an updated web browser version.
  • Secondly, you need to turn the power on by connecting the Netgear EX6120 device to the power.
  • Once the device power is on you need to start configuring it by connecting a device with its network.
  • Thereafter you should open the web browser you have in the device and then search for mywifiext.net
  • Access the portal and search for new extender setup option to proceed with Netgear EX6120 Setup
  • Move further by following the on screen guide and create a netgear account
  • Choose the “WiFi range extender” option from the opened screen.
  • Proceed with selecting your home network SSID and then provide the password as well.
  • Choose the connect option from the screen to complete the setup process.
  • Create a SSID for your new extender device & a password too.
  • You may use the similar SSID & password as your current network has.
  • Furthermore, we advised to keep a secured password to protect any unauthorized access.
Netgear EX6100

Easy And Quick Setup Guide For Netgear EX6100

It is so common to face connectivity issues and dead spots when you only rely on routers. So it’s high time to get wifi range extenders. As they not only provide solutions to connectivity issues but also improve the overall performance of existing wifi networks. When it comes to range extenders, nothing beats Netgear EX6100 Setup. This magical range extender is the perfect choice for extending both office as well as home networks. With its successful installation you get to enjoy high speed and wider coverage in every single corner.

Overview Of Netgear EX6100 Range Extender

It is a little box with so many great features. The Netgear EX6100 Setup provides fast internet speeds of upto 750Mbps. Additionally, the fast lane technology with the use of dual bands creates a one high band connection. Further with the presence of Ethernet Port you can easily connect wired devices for direct connection. Moreover the external antennas are a game changer as they provide stable and wider coverage.

To be specific on the front panel of the extender you get different smart LED light indicators. These indicators help in the easy installation process as well as clearly depicts the actual working of the extender.

Whereas on the side panel of the Netgear EX6100 Setup you get one Ethernet port, power On/off button, WPS button, a Reset button and lastly a access point/extender switch button.

Installation Steps

Now as you are familiar with the complete feature set of Netgear EX6100 Setup, it’s time to move forward to the installation process.

Step 1: Place The Extender And Power It On.

NETGEAR recommends users to place the EX6100 near to the router during initial setup. As the installation completes, you can move the extender to a desired location which is ideally halfway from the router and the area with connectivity issues.

After the placement, plug in the EX6100 to a power source. Power it on and wait for the power LED on the front panel to turn green. If the power LED doesn’t light up then turn on the power button from the side panel of the extender. Further ensure the switch on the Netgear EX6100 is set to “EXTENDER” as the WPS method is for that only.

Step 2: Connect With WPS

With the WPS based Netgear EX6100 Setup method you do not need to enter the username or password. Simply push the WPS button from the side panel of the EX6100 wifi range extender. Wait for the WPS LED on the front panel to blink Green. It indicates that the extender is ready for the WPS connection with the router. Now within less than two minutes push the WPS button on your home router. The whole setup process gets completed within a few seconds and eventually the WPS LED stops to blink and turns solid green.

Lastly, check the router link LED on the EX6100 extender. If it is solid green then the connection is best and successfully done.

Step 3: Connect And Relocate

Finally, connect your devices to the new network. For easy identification the newly extended network name of the EX6100 will now have _EXT added at the end. Connect to it by using the same security key (password) as that of your router. Once connected check the client link LED. It should be solid green for the best connection.

Netgear Extender Setup

Complete Guide to 192.168.1.250 Netgear Setup

The use of the internet in our daily lives is very vast and common. Due to which one single router cannot fulfill all the needs effectively. Users either face the issues of dead zones, intermittent internet connection or poor connectivity and much more. This is where the Netgear Extender Setup comes in for the rescue. The successful setup of the Netgear Extender can make a huge difference. It not only covers your entire area but also provides fast and reliable internet connection to your each device. So, this guide will walk you through the 192.168.1.250 netgear setup process. To get the complete insights, keep on reading.

Steps For 192.168.1.250 Netgear Setup

The Netgear Extender Setup steps are very easy and simple to perform. Even the person who does not possess any technical skills can complete the setup independently.

Step 1: Power On

Firstly, plug in the Netgear Extender into a power outlet and switch it on. The power LED should light up. In case there is no light then push the power on/off button.

Step 2: Connect

Now for the further Netgear Extender Setup, select any smart device. Connect the device to the extender’s default wifi network. To connect, turn on the wifi and connect to the network name NETGEAR_EXT. Although it is an open network, in case the password is asked then enter “password” as a default password.

Step 3: Open An Internet Browser

Further, on the connected device open any internet browser like Google Chrome, Firefox, Safari or any other of your preference. But be sure that the chosen browser is updated and all the caches and cookies are cleared.

Step 4: Log In

To log in first go to the address bar of the browser and type 192.168.1.250 and press Enter. Alternatively you can also use the default web address for accessing the login page. The default web address is http://mywifiext.net. Now, enter the details and tap on “Log In”. Now after you login, tap on “NEW EXTENDER SETUP”.

Step 5: Follow The On-Screen Instructions

The last step for completing the Netgear Extender Setup is to follow the on-screen prompts precisely. It includes selecting the name of your local wifi network and entering its password. As the setup completes, check the connection by connecting your devices to the extended network.

Netgear Extender Setup Using WPS Method

If by any chance the 192.168.1.250 netgear setup doesn’t work for you or you are simply looking for an alternative to the above method then here you go. The WPS method is the least time consuming. All you need to do is just push the WPS button for the setup. But here the essential requirement is that your router should also have a WPS button.

  • So first place the Netgear range extender near the router.
  • Also make sure there are no physical barriers or obstructions in the middle of both the devices.
  • Now power on the extender and wait until the power LED turns solid.
  • Further press the WPS button first on the Netgear Extender and within the next 30 seconds push the WPS button on the router.
  • Once the synchronization is done, the WPS led on both the devices that is router and the Netgear Extender will turn solid thus indicating a successful Netgear Extender Setup.
  • Lastly, you can unplug the extender and move it to a new location where you were facing connectivity issues. But make sure it is within the range of the host router. To know about the same, take the help of the smart LED light indicators.
Netgear EX2700 Setup

A Complete Setup Guide For Netgear Extenders

Extenders are the great networking device that helps you in easily extending the reach of your existing network. So if you recently expanded the total area of your home and are facing connectivity issues then instead of buying another router you can invest in a good quality range extender. Now the market provides so many options when it comes to range extenders. But nothing beats Netgear. Netgear provides so many options for diverse networking needs. So you can choose the one that matches your requirement. In today’s guide we’ll be sharing the Netgear AC1750 Setup and Netgear EX2700 Setup. Both these range extenders are perfect for today’s modern households.

Netgear AC1750 Setup Using Nighthawk App

We will be providing two different methods for the extender’s setup. But both the methods work for both the range extenders. So you can choose the one method as per your convenience.

Placement

Firstly, place the Netgear AC1750 range extender near to your host router. Clear the nearby area if it has any electronic or metal objects. As these objects can interfere with the signals thus causing inconvenience during the setup.

Power On

Secondly, plug in the range extender into a wall socket. Power it on. Wait for the power LED on the AC1750 range extender to turn solid green. In case the power LED does not light then press the On/Off power button on the extender.

Download The Nighthawk App

Further, take up your smartphone or you can also use any other device like your computer, laptop or your iPad. If you are an Android user then download the Linksys app from the Google Play Store. Whereas if you are an iOS user then download the app from the App Store.

Connect To The Extender

Next, connect your device to the extender’s wifi network. For this open wifi settings on your device and look for the network name Netgear_EXT. Select it and click on “Connect”.

Complete The Setup

To complete the Netgear AC1750 Setup open the Nighthawk app. Create your Netgear account. Lastly, follow all the on-screen prompts. Within a few minutes your extender will be up and ready for use. Now you can move the extender to your preferred location. Just make sure the extender is within the reach of the router.

Netgear EX2700 Setup Using WPS Method

Using the WPS method for your Netgear EX2700 Setup allows you to complete the process with just two simple steps. Once the placement of the extender is finalized and its powered on, all you need to do is follow these steps:

  • Push the WPS button first on the Netgear EX2700 range extender. You can easily locate the WPS button on the side panel of the extender.
  • Next, press the WPS button on your host router. It should be done within the time span of 2 minutes. Now let the extender and the router synchronize.

The WPS LED on both your router as well as your extender will turn solid green thus indicating a successful setup. Once done connect your devices to the newly extended network and enjoy high speed internet connection in every single corner of your home.

Connect For Support !

If you are confused about the process or have any doubts then feel free to connect to our experts. All the contact information is mentioned downwards.

Netgear AC750 Setup

Netgear AC750 Setup – A Comprehensive Guide

Do you have a Netgear AC750 extender device? Are you in search of a Netgear AC750 setup guide? You land on the absolutely right page. In this page you’ll get a detailed guide about how to set up the device. In the further section of this page, you will get step by step instructions to access mywifiext.net setup page. Moreover you’ll get additional information about the AC750 netgear device too. So, what are you waiting for, let’s walk through the instructions. Read the information till the last to get a deeper knowledge.

Netgear AC750 Extender

Netgear AC750 Extender device is often used by the people to enhance their home network. There are several models including EX2800, EX3110, EX3700, EX6100 etc. These models offer speed up to 750Mbps from both the frequencies. The device is a compact wall plug design that can easily be installed. You don’t need a separate place to keep the device. All the models have antennas to extend your existing WiFi signals. If you have any of these models then you can check out the Netgear AC750 Setup process to configure your device.

Netgear AC750 Setup Steps

To configure your netgear WiFi extender device you need to use a web interface or WPS method. The WPS method is a very quick way to add the device in your home network. You can check out the steps to follow in both the methods:

WPS Setup

It is the easiest and most convenient method. In this method you need a router with a WPS button. Firstly locate the router device WPS and thereafter move ahead with following steps:

  • Prior to moving ahead, power up the extender device by plugging into the power outlet.
  • Push the WPS button on the extender device.
  • Hold it for about 6 seconds.
  • Monitor the LED of the extender device.
  • Push the WPS button on the router device. (within two minutes)
  • Wait and let the device complete the configuration.

mywifiext.net Setup

mywifiext.net Setup allows the users to access settings along with the setup. You can easily initiate the setup by following the guide:

  • Power up your extender device by connecting it to the power outlet.
  • Thereafter, connect the computer, laptop or mobile device with the extender network.
  • Then, launch a web browser in which you can browse mywifiext.net setup page.
  • Login to the web by using the default user ID & password.
  • NETGEAR installation assistant will guide you further to complete the setup.
  • You need to choose your existing network details during the process.
  • Moreover don’t forget to make changes in your device SSID & security key. You cannot protect unauthorized access without this step as the one who is aware of default settings can access your network.

We hope the above mentioned guide will prove to be helpful for you. In case you need technical help yet, you can connect our team anytime. Our team is available 24/7 on call to assist you regarding Netgear AC750 Setup. Also you can get assistance on troubleshooting the issue.

Mywifiext.net Setup

Mywifiext.net Setup and Troubleshooting-Easy Guide

Netgear WiFi Range Extender device used by many of us to extend our home wifi network coverage. The device is reliable and significantly enhances your network coverage and overall connectivity. To use the device, you have to do installation and setup. It is very easy to do by using mywifiext.net Setup web address. You do not need any technical expertise to install and run the setup process. Just a little knowledge of the process is pretty enough. Further on this page you will find a detailed guide in an easy way. This page includes how you can do extender settings by using mywifiext.net Setup page. Moreover, you also get a detailed netgear extender troubleshooting guide. In case you face any issue, you can follow the troubleshooting to overcome the obstacles.

Netgear Extender mywifiext.net Setup Prerequisite

Certain prerequisites are there which you need to follow prior commencing the setup process. Check the list of requirements

  • Netgear extender device connected with power socket.
  • Working internet connection
  • A client device to use mywifiext.net Setup page
  • Ethernet cable to connect client device with extender via cable.

Netgear Extender mywifiext.net Setup Process

Once all the prerequisite demands complete, you can move further and start the setup process. Netgear extender setup process may include few steps as mentioned:

  • Firstly, you need to connect your client device with the extender network. Connection can be made using Ethernet cable. Moreover, you can also opt for a wireless method to establish connection.
  • Thereafter open the web browser on your device and search for the web address “mywifiext.net” or IP address “192.168.1.250.”
  • Login page will appear on the screen, here you need to enter the required details. You can check default details on the back of the extender device.
  • Once you get the details, enter in the given space and press the login button. This will radiate you to the admin interface.
  • Then you need to begin the setup by choosing your existing Wi-Fi network. Once you select the network, provide a password on screen.
  • Submit the password and your extender device will start connecting with your network.
  • Once the LED of the extender device stops blinking, your device reboot itself. Wait till the device restarts and as it happens your extender network is ready to use.
  • Lastly you need to check the extended signal strength and for that you need to connect a device with an extender network and surf the internet.

Netgear Extender mywifiext.net Setup Troubleshoot

Even after you are using a high quality device you may encounter trouble. with netgear extender you may face problems such as unable to access mywifiext.net, login issue, configuration problems, extender not working properly etc. To solve these problems, you can try the given troubleshooting, it may help you.

  • Firstly, ensure the device is connected with the extender network you are trying to configure.
  • Thereafter if mywifiext.net is not working for you try using IP address “192.168.1.250.”
  • In case you face a login issue, check the details you are entering twice and retry.
  • Verify the extender placement. It must be within the range of your router device.
  • Reset the extender if necessary, in case all the above troubleshooting is not helping you.
Netgear AC750 Setup

Understanding The Netgear AC750 Setup

Are you tired of using those traditional routers that don’t provide you with complete coverage and consistent internet speeds? If yes, then it’s high time to buy yourself one Wifi range extender as they can easily amplify and extend the reach of your current network. They are not just ideal for residential purposes but can also be used at commercial sites. One such brand that tops the list for making the best Wi-Fi range extenders is none other than Netgear. So today we will explore the Netgear AC750 Setup. We will cover its features and setup process. So without further ado let’s begin.

Key Features Of Netgear AC750 Setup

Here’s what makes Netgear AC750 a reliable WiFi extender:

  • It comes with dual frequency bands. One 2.4 GHz band and another 5 GHz band. Both bands provide you with the combined speeds of up to 750mbps.
  • The Netgear AC750 is capable of extending the coverage and kicking out all the dead zones from your abode.
  • For wired and stable connection you get a 10/100 Mbps Ethernet port. Therefore, you can directly connect your gaming consoles, smart TVs and much more to it.
  • Its smart LED indicators show the signal strength to help you find the perfect spot for the placement of the extender thus saving you time.
  • Its WPS support allows for a quick and secure setup with a compatible router. It just requires pressing the WPS button on the router and then within a minute on the extender.

Netgear AC750 Setup Guide

By following the below-mentioned steps and utilizing its features, you should be able to effectively extend your Wi-Fi network coverage with the Netgear AC750. So let’s begin:

Positioning

Placement of the range extender is extremely important if you want complete coverage. So place the extender in a position that is halfway between the router and the place where you need the extended coverage.

Power On

Now, plug in the extender into a power outlet and power it on. Make sure that the power supply is Uninterrupted and constant throughout. Wait for the LED light on the extender to stabilize before proceeding further.

Connect To The Extender

Take up any device of yours and go to Wi-Fi settings. In the list of available networks search for the network named “Netgear_XXX” or something similar to it. Once found, click on “Connect”.

Open A Web Browser To Access The Setup Page

Now on the same connected device, launch a web browser like Google Chrome, Edge, Mozilla Firefox or Safari. In the address bar of the browser enter “www.mywifiext.net” and press the “Enter” key.

Log In

Once you reach the setup page, you will be prompted to enter the Username and Password. In the username column enter “admin” and in the password column enter “password”. Click on “Log In”.

Setup

As soon as you click on “Log In”, the setup page will give instructions to you. Just keep following the instructions carefully and do not skip any step. It will help you connect the extender to your existing Wi-Fi network. You’ll select your network and enter your Wi-Fi password.

Reconnect

After setup, reconnect all your devices to the newly extended network. The extender’s default extended network name will include your original network’s name with a suffix like “_EXT.” And that’s all, your Netgear AC750 setup is all done and dusted.

Netgear EX3700 Setup

NETGEAR EX3700 Installation & Setup

You need a WiFi extender when you are in a dead zone where existing network connection is poor. WiFi extender will help you in boosting existing network range. It works as a path in between the device on which you desire to use WiFi (out of range from WiFi router) and a WiFi router. NETGEAR EX3700 is a range extender which works for you to amplify your network. You can do NETGEAR EX3700 setup very quickly without any expertise. On this page you will get detailed information about NETGEAR EX3700 setup.

NETGEAR EX3700 Installation

  • You need to place the NETGEAR EX3700 near to your main WiFi router in the same room.
  • Plug in the extender into a power socket and wait for the power LED to turn green.

NETGEAR EX3700 Setup Process

You can opt any one way to set up your NETGEAR EX3700 by follow the steps given:

Web Based

To go with web based setup, you need to open the browser you want to begin with in laptop/ computer/ mobile/ tablet

  • Go to the address bar and enter www.myWiFiext.net in
  • Extender setup screen will display from where you need to choose create account option
  • Complete the details asked and click on next option
  • Now choose your regional settings and go ahead by press next
  • Choose WiFi range extender option and select a WiFi network
  • Now enter the existing WiFi password and hit next
  • Set the name for your network and its password
  • Connect with the network you created and press the continue option.
  • This will lead to the registration screen, complete the process and hit finish.
  • Unplug the extender and move to the other location.
  • Again connect with the power supply and you are ready to use the network.

WPS Based

  • To go ahead with WPS based setup you need to press the WPS button on the NETGEAR EX3700
  • With-in two minutes, press the WPS button on the main router to connect the router with the extender.
  • This process will lead to change in LED display on router and extender.
  • Extender LED become solid green and routers LED color become light
  • The setup is complete when you notice this change. If it’s not then try it again.
  • Now use a WiFi device and check the extender name in the list of WiFi
  • Connect the device with the extender network with the same password
  • Unplug the extender and move to the other location where you wish to place it.
  • Tip: If you see a red light on your extender, move it closer to the main router.
netgear ex3700 setup

Master Your Netgear Extender With Simple Steps

There is no doubt about the fact that the internet has become an essential part of our lives. We need access to reliable, super-fast, and smooth internet to carry out our day-to-day activities. From making payments, and doing work to communication, the internet plays a crucial role everywhere. So why settle on the bare minimum when you can amp up your internet connection by just installing one super powerful device named a Netgear EX3700 Wi-Fi range extender? As the name itself suggests it is a device that extends the range of your existing network. It spreads the internet signals like fire in every corner of your home thus completely eliminating dead zones. So without further ado let’s learn more about this device.

Features Of Netgear EX3700 Setup

Here are some commendable features of the Netgear EX3700 setup:

  • Netgear EX3700 supports dual-band technology. It comes with one 2.4GHz band and another 5GHz frequency band which means it will offer better range and stability as compared to single band extenders. So If you have a big family or have multiple devices running in your home then dual-band routers can be your savior.
  • The presence of the 802.11ac Wi-Fi Standard provides faster Wi-Fi speeds and better coverage as compared to older standards. So no more waiting time for downloads and uploads or interruptions while streaming HD videos.
  • Its fast lane technology allows you to use both Wi-Fi bands simultaneously for a high-speed connection. You can simply compare it to the two-way highway which makes your driving experience super convenient.
  • Placement is the key when it comes to the best performance of the range extender. So to help you find that one perfect sweet spot, it comes with smart LED indicators that guide you towards the area where there is best Wi-Fi coverage.
  • The availability of Ethernet Ports enables you to connect wired devices like gaming consoles or smart TVs directly to the extender.

Netgear EX3700 Setup Guide

Placement

Begin by placing the range extender near your host router. Place it in a central location where it can receive the signal from the router as well as near the area where you need extended coverage.

Power It On

Now plug the extender into an electrical outlet and switch it on for a proper supply of electricity. Once it’s on, wait for a few seconds for the LED light on it to stabilize.

Connect To The Extender

Take your preferred device, go to its Wi-Fi settings, and search for the network name “Netgear_EXT” in the list of available networks. On finding, connect to it.

Launch Web Browser

Now, launch a web browser of your choice and in its address bar enter the default web address which is “mywifiext.net” and press ‘Enter’. Simply follow the on-screen instructions to set up your extender.

Select Network

After connecting to the extender, select your existing Wi-Fi network that you want to extend and you’ll be prompted to enter the password of your existing network.

Complete The Setup

You can customize different settings as per your preferences. Once you do so, click on the “apply the changes” option. During this process, the extender might reboot itself. Once it reboots successfully you can connect your devices to the newly extended network. And that’s it your Netgear EX3700 Setup is completed successfully.

netgear ex3700

Say Goodbye To Dropped Signals With Netgear EX3700 Setup

The world is moving at such a fast pace that everyone wants to do everything super fast. So when you live in a world which is completely driven by technology it becomes important to have access to the fast and smooth internet to be able to perform each task rapidly. People are full of ideas, there is cutthroat competition and to execute these ideas the first and foremost requirement is to have access to the internet. So if you are also lagging behind only because your internet gives upon you during crucial moments then it’s high time to get yourself a WiFi range extender. Now you might be wondering what it is. Do not worry, just keep reading and we’ll solve all your doubts.

What Are Wi-Fi Range Extenders?

Wi-Fi range extenders are like little helpers for your router. They can make your internet reach the places where a signal from your router can’t reach or is weak.

When you’re close to the wifi router, the signal is strong and bright. But as you move farther away, it gets weaker and dimmer. That’s where a wifi range extender comes in. A wifi range extender acts like a signal booster. You just need to plug it into a power outlet in an area where the wifi signal is weak. It connects to your existing wifi network and then creates a new network with a stronger signal. So, if you’re tired of slow internet or dead zones, a wifi range extender can be a great solution to make your internet experience much better.

Now the market is flooded with a number of options to choose from, so you may get confused and end up buying the wrong product. So to save you time and money we have the best option for you which is none other than the Netgear EX3700 Setup.

Netgear EX3700 Setup Guide

So if you take up our suggestion and decide to purchase a Netgear EX3700 Wi-Fi range extender then here’s an easy step-by-step guide for you to install the same.

  • Plug in the range extender near your Wi-Fi router and wait for the power LED to turn solid green.
  • Connect your device (phone, tablet, or computer) to the range extender’s Wi-Fi network, which is named “NETGEAR_EXT.”
  • Now open a web browser of your choice and enter “mywifiext.net” in its address bar. If it doesn’t work, try the default IP address “192.168.1.250” instead.
  • Further, just follow the on-screen instructions to set up the range extender. You can choose to use the same network name and password as your existing Wi-Fi or create a new one.
  • Once the setup is complete, disconnect from the range extender’s network and reconnect to your main Wi-Fi network.
  • Place the range extender in an ideal location which is about halfway between your router and the area where you need the extended coverage.
  • Enjoy the boosted Wi-Fi signal and expanded coverage throughout your home or office!

That’s it! With these simple steps, you’ll have your Netgear EX3700 Setup ready and running in no time.

Disclaimer:- mywifiextlogsetup.com website is for customers who are seeking technical help and technological assistance/support service for WiFi extenders, routers, and WiFi networks. However, we do not have any endorsement, alliance, or affiliation with any brands neither direct nor indirect. All the images, brand names, product models, and logos are only for illustrative purposes. Guidelines provided on the website are solely for informational purposes. Neither a guarantee nor an implied warranty is provided regarding the content available on the website.