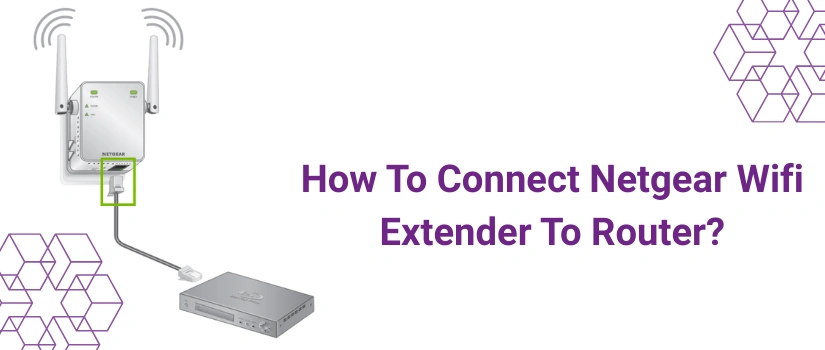
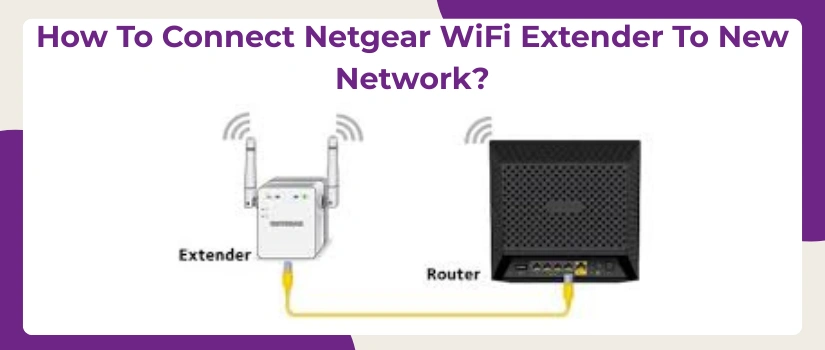
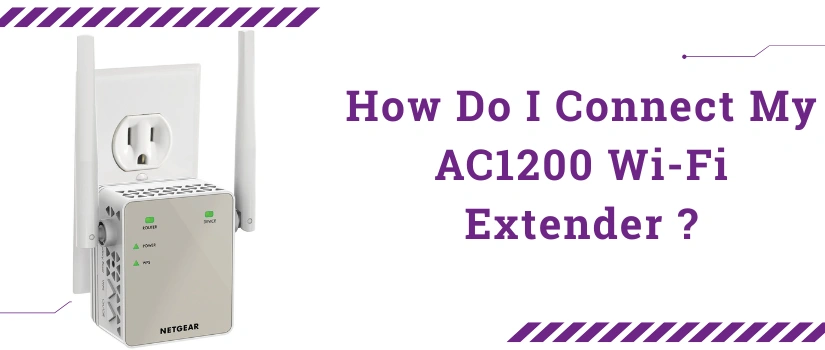
Netgear AC3000 Setup

How To Setup Netgear AC3000 Using Mywifiext.Net?

Don’t know how to proceed with Netgear AC3000 setup using mywifiext.net? Do not worry, just accumulate the information on this blog. We designed this content to make you aware how you can yourself perform the setup. Furthermore we are also going to specify the device specifications. To use the device in a better possible way it is very significant for you to know it.

Netgear AC3000 is a tri band router with 2.4GHz frequency speed up to 400 Mbps, 5GHz frequency speed up to 866 Mbps and 5GHz frequency speed up to 1733 Mbps. Ethernet ports with auto-sensing technology, Multi-User MIMO technology and WPA/WPA2-PSK & WEP Standards of security make it perfect. User friendly web interface access allows the configuration very smoothly. Follow the step by step guide to embark on the netgear ac3000 setup process.

Placement

Embark on the process with the placement of the device. Placement for the setup must be closer to the host router device. Also there should be an electric outlet placed nearby to power up.

Power

Moving to the second step of the netgear ac3000 setup, you have to turn on the extender. Powering requires the power adapter to connect in the DC connector port. Then plug-in the adapter into the power outlet and switch it on. Wait for the bootup complete and then proceed further.

Connect

Thirdly, you need a computer/ laptop device in which you can access the google chrome or other web browser. Connect the device with netgear AC3000 network by accessing wireless settings or using ethernet cable. For wireless connection the information is given on the device label.

Access

Thereafter you have to access mywifiext.net portal. Launch the browser of your choice and mention the address in the address bar. Search and the portal appears. Now netgear installation assistant will help you out in configuring the device.

Configure

Start the configuration of the device by following the instructions of netgear installation assistant. Connect the device with the host router device by choosing the SSID of the router. Mention the password of the main network as well to connect. Then move ahead in the netgear ac3000 setup process to make security settings.

Secure

Secure your netgear ac3000 extender network by creating a new SSID & password. Replacing the default information is very important to protect the network. Also make other important changes and update the firmware to keep your new network secure. Don’t forget to finalize the changes by choosing the submit option.

Relocate

You have to relocate the device after completion of the netgear ac3000 setup. Relocation is required for the optimal performance of the device. While placing the device again choose a location in between the placement of the router and where you were facing connectivity issues. Also avoid placement in corners, next to thick walls and closer to heavy metal objects or radio frequency devices.

Test

Testing the network is very important. Once the setup is complete you have to perform a test to verify whether the device is working as you expected or not. Also by testing the network you will be able to know if the placement of the device is adequate or not. If you face a weak signal or no signal then relocate the device.

Conclusion

Netgear ac3000 setup is very easy by using the mywifiext.net portal. Above specified steps will help you in configuring the network. In case you get stuck at any point of the setup process then connect our technical experts for help. Contact number is specified above. Also you can request a call back.

Netgear AX1600 Setup

Revive Wifi Dead Zones With Netgear AX1600 Setup

Want to achieve seamless wifi connectivity for every single room or office corner? If yes, then surely the Netgear AX1600 setup is worth the investment. As it is a magical range extender that covers the entire area with high speed and reliable wifi signals. Therefore, where the router’s signals fail to reach, the Netgear AX1600 wifi range extender fills the gap. For complete insights about the same, check the whole guide. Here we have discussed everything that the user might want to know.

Overview Of Netgear AX1600 Range Extender

The Netgear AX1600 setup works in collaboration with the router. It gathers the signals from it. Thereafter multiply these signals to create a mesh network. And then finally, transmits these signals in various directions thus covering up the entire area. Overall it provides the speeds of upto 1.6Gbps. Moving further, with the help of Ethernet ports, the wired connectivity becomes easier. The Netgear AX1600 operates on the latest wifi 6 standards. This means no lags and bufferings, signal drop offs, or poor connectivity during important web activities.

Initiate The Quick Setup Via WPS

The Netgear AX1600 setup process is quick, simple and hassle-free, all thanks to the Wifi Protected Setup. For initiating the setup, first bring in the range extender nearby to the host router. Before proceeding further, make sure the host router is active and has an active internet plan as well.

Moving further, plug in the AX1600 to a vacant wall outlet. Switch it on. Now hold on for at least two minutes as the extender boots itself up.

Now, push the WPS switch first on the AX1600. Thereafter move to the host router. Repeat the same step on it as well. Again hold on, as the syncing takes place. Check the WPS LED and confirm whether the Netgear AX1600 setup via WPS is successful or not. To know the exact meaning of glown up light, check out the quick user guide.

As the setup journey completes, relocate the AX1600 to its specific location. After you find the sweet spot, replug the device. As it boots up, connect to the new network and test the connection. If there are weak signals, move the Netgear AX1600 setup, closer to the device.

Right placement is very important. So take enough time to find the best location which should be away from electronic and metal objects. As well as from other physical hindrances like walls and furniture set.

Personalize The Network Via mywifiext.net

Although the Netgear AX1600 setup using WPS method is super quick, the drawback is that it doesn’t allow the user to personalize the various settings. Therefore, in this case mywifiext.net comes in for the rescue.

Start by opening any internet browser on your smart gadget. Be mindful that the smart gadget needs to have a connection with the Netgear AX1600 either wirelessly or through ethernet wire.

Moving further, head to the address bar. In it fill up mywifiext.net. Press Enter. Fill up the username and security key. Collect this information from the quick user guide. As you do so, you get access to so many settings. First we recommend moving directly towards the Firmware update option. And perform the update if any, as this will optimize the performance of the Netgear AX1600 setup by at least three times. Next change the login details and set up strong security encryptions.

Netgear EX6200 Setup

Reshape Your Home Network With Netgear EX6200 Setup

Muddled between different extender devices? Don’t know which is perfect to reshape your home networking system? Thinking of setting up Netgear Ex6200. You came to the right page then. Here we furnish detailed information about the Netgear EX6200 Setup. Furthermore we also mentioned the specifications of the device which will help you understand how the device will stand out best to reshape your home network. Hence, you can accumulate the details from this article prior to making a decision. Also, this article will help in setting up netgear extender device.

Netgear EX6200 Specifications

Netgear EX6200 is a range extender device that helps in extending the network coverage of your existing router device. With the setup of the device you will get wireless network speed up to 1.2 Gbps. It is a dual band wireless networking device featured with 5 ethernet ports for wired connection. Also has two external antennas for network coverage. Netgear EX6200 setup is not a daunting task as it support WPS button based setup. You can add the device by pushing a button within a few minutes.

Netgear EX6200 Setup Process

Setting up Netgear EX6200 is a modest process that anyone can follow. Configure your netgear extender device by using the WPS based setup or using web interface. Step by step instructions to follow via both the methods are specified in the further section.

WPS Setup

WPS setup requires a netgear ex6200 device, power outlet, power adapter and host router device with working internet connection & WPS enabled.

  • Embark on the setup process by placing the device next to the host router.
  • Thereafter powering the device & letting it boot up properly.
  • Now compress the WPS button of the host router.
  • Retain the buttons around 10 seconds and then renounce it.
  • Within two minutes do the same with extender WPS.
  • Lastly, monitor the LED of the extender device.

Note: If LED turns into solid green in color means the connection is successful.

Web Setup

Web setup requires a netgear ex6200 device, power outlet, power adapter, ethernet cable, computer/ laptop and host router device with working internet connection.

  • Embark on the Netgear EX6200 setup process by placing the device next to the host router.
  • Thereafter boot up the device using the power adapter and wait till it properly starts.
  • Now establish a link between your computer/ laptop device & netgear extender using ethernet cable.
  • Also you can establish a link by accessing the wireless network of the netgear extender.
  • Henceforth, launch a browser to access the www.mywifiext.net portal.
  • Access the site & commence process by selecting “NEW EXTENDER SETUP”
  • Follow the screen prompts and configure all the important settings.
  • Netgear installation assistant will guide you with the whole setup process.
  • After linking your device with the host router network by adding its SSID and password make sure to change the default details of your extender network.
  • Lastly, check for the firmware update & finish the setup by relocating your extender device.

In case you get stuck anywhere during configuration, take help from our technicians.

Netgear Extender Setup

Netgear Extender Setup: Using Two Different Methods

Fed up of constant connectivity issues like dead zones, slow speeds, dropped connections? If yes, no worries as here is the solution. The solution is Netgear AC2200 setup. It is a wifi range extender that provides seamless coverage from the front door to the backyard of your abode. This Netgear extender setup is not just suitable for home environments but can also work magically in your office space. It effectively cuts down all the dead spaces from your place. In return it spreads the wifi signals in every single corner. To know the setup process, follow the guide till the end.

Begin Quick Setup With WPS Method

For Netgear AC2200 setup using WPS method, the primary and absolute necessity is that the host router should have a WPS button. But in case it doesn’t possess this function, then also no worries as we have an alternative. To know about it, keep on reading.

Setup Steps:

  • After carefully unboxing the AC2200 extender, place it in close proximity to the host router.
  • Now plug the signal repeater into an electrical outlet. Power it on. Check the status of the power LED, it should be solid green.
  • After that on the Netgear AC2200 setup panel you’ll see a WPS button. Press it down. Do not release until the WPS LED starts blinking green.
  • Moving further, push the WPS button on the host router. The syncing starts. Relax till the WPS LED light turns solid and the Device Link LED glows up. As this happens, you can rest easy knowing the Netgear Extender Setup is successful.
  • At last, unplug the AC2200 extender and move it to the location which is in the center of your host router and the problematic area.
  • Connect to the power supply and test the connection by connecting the devices. Further to know whether the placement is correct or not, check the router Link LED, it should be green. If it’s amber then move the extender closer to the host router. Keep dragging it until the LED turns green.

For Better Network Configuration Select Setup Via Web Browser

There is no denying the fact that using the WPS method for Netgear AC2200 setup takes less time and is convenient for many users. But at the same time the WPS method doesn’t allow the user to customize the network or other settings of the extender. This is where the setup via web browser comes in handy.

Steps To Follow:

  • First of all power on the Netgear Extender Setup by plugging it into the wall socket.
  • After that, pick any smart gadget from your collection. It can be anything like your cellphone, iPad, PC or your laptop.
  • Moving forward, visit the wifi settings of your gadget and toggle the wifi. As it turns on, a list appears on the screen. Pick up the right name of your AC2200 it is Netgear_ EXT and Connect.
  • After that, launch an internet browser on your gadget. It should be free from caches and cookies. Further should be updated to its latest version.
  • Open a new tab. Fill www.mywifiext.net. Hit enter.
  • Now to complete the Netgear AC2200 setup, follow the directions that pops up on the screen one by one.
  • As the setup completes, reposition the repeater and connect your devices.

Note: The placement of the extender decides how the network will work. Therefore correct and strategic placement is absolutely necessary. Consider a few points before placement like, there shouldn’t be any physical barrier like thick walls between the host router and the Netgear wifi repeater. Further, avoid placing electronic and metal objects in the close premises of the extender. Common objects that users can avoid are fish tanks, microwave, refrigerator, cordless phones, bluetooth devices, security cameras and baby monitors. Additionally, try placing the repeater in an open and well-ventilated area. Also keep it on a heightened surface like a table top or on a shelf.

Netgear EX6120 Extender Setup

Boost Your Wifi Signals With Netgear EX6120 Setup

Looking for a complete guide on Netgear EX6120 Setup? Here you go. This guide covers it all, from feature set , device description to setup process.

Feature Set

The Netgear EX6120 Setup comes with a variety of features. To begin with it offers dual bands. The 2.4Ghz band provides signals to your far away devices as it can easily penetrate through various physical obstacles. Whereas the 5GHz band provides faster speed. The EX6120 provides speeds of upto 1200Mbps. The high power external antennas provide reliable and wider coverage throughout your abode. Additionally you get an Ethernet port for connecting wired devices directly to the extender. Moreover you can use the Netgear EX6120 Setup in two ways that is in access point mode and as an extender.

Netgear EX6120 Overview

Now as you are familiar with the features of the extender, it’s important to know about other physical aspects as well. So the EX6120 is a simple wall plug designed extender. On its front panel you get four smart LED light indicators. On one side panel you get three buttons. Starting from the top, one is a reset button, WPS button and at last you get Power On/Off button. On the other side panel you’ll find the Ethernet port.

Netgear EX6120 LED Descriptions

For a smooth and quick Netgear EX6120 setup, understanding the meanings of different LED lights is important.

  • Starting with the Router Link LED. This LED light clearly depicts the connection between the router and the EX6120. A solid green light depicts a best connection whereas the red light depicts a poor connection.
  • Moving forward to the Device Link LED. It tells about the connection between your device and the EX6120. Again the solid green depicts a best connection, red light means poor connection.
  • On the power LED if you see an amber light, it means the EX6120 is booting up. When it turns solid green then the extender is ready for use.

Netgear EX6120 Installation Guide

For a successful Netgear EX6120 setup placement of the extender plays a crucial role. So before we dive into the installation steps let’s place the extender strategically.

For best performance place the EX6120 nearby to the host router. Away from electronic and metal objects. Some common examples are fish tanks, security cameras, cordless phones, microwaves, bluetooth devices, refrigerator and aluminium doors. In between the router and the extender there shouldn’t be any physical barriers like a wall or heavy furniture set. The closeness to the router is important only during the initial setup and not after the Netgear EX6120 setup completes. After the completion you should place the extender in between the router and the problematic area.

Installation Steps

  • As the EX6120 is a wall plug extender, plug it directly to a wall socket. After that, turn it on.
  • Don’t hop onto the next step, until the power LED turns from amber to green. If it doesn’t light up then from the side panel push the On/off switch.
  • After that, gently push the WPS button from the side panel. Do not release it until the WPS LED starts blinking.
  • Immediately take a turn towards the host router and press the WPS button on it as well. After a while you’ll notice the WPS LED on the extender turns into a bright solid green color. The Netgear EX6120 Setup completes when the router link LED also turns solid green.
Netgear Extenders

Boost Wifi Coverage With Netgear Extenders

Netgear provides its users with a vast variety of wifi extenders. Depending on the coverage area and wifi needs you can select any for your home or office. In today’s guide we’ll be particularly sharing the details about the Netgear EX7700 Setup and Netgear AC1900 Setup. Although the setup process for both the extenders is exactly the same, the only difference is in the feature set.

Netgear EX7700 Setup Features

Before proceeding towards the Netgear EX7700 setup process, first lets check out its magical features.

  • EX7700 extender operates on 802.11ac wifi standards.
  • It comes with three frequency bands. The band number one that is 2.4Ghz band, provides speeds of upto 400 Mbps. Whereas on both the 5GHz bands you receive the speeds of upto 866 Mbps.
  • Further the Netgear EX7700 Setup comes with two ethernet ports and that to with auto-sensing technology.
  • Thereafter the high security encryptions are worth considering. In EX7700 you get WPA/WPA2-PSK and WEP security standards.

Installation Guide

As mentioned above the installation process for both the extenders is similar. But we’ll be discussing two different methods one for Netgear EX7700 setup and other for the Netgear AC1900 Setup.

Netgear EX7700 Setup Using WPS Button

Let’s first unbox the extender. Inside you’ll find in total three components. One Netgear EX7700 extender, one power adaptor as per your shipping country and lastly a quick user guide.

  • Now bring the tri-band extender to the same room as your router.
  • First attach the power adapter to the EX7700. After that plug in the power adapter to the electrical switch board. Press the power button and wait for the power LED to turn from solid amber to solid green.
  • Now carefully push the WPS button on the EX7700 extender, you’ll see a blinking white light on the WPS LED. After that press the WPS on the nearby router.
  • Wait as the syncing process takes a few seconds or a minute to complete. A solid white light on the WPS LED informs you that the Netgear EX7700 Setup is successful.
  • Lastly, move the tri-band extender to a desired location. But be cautious as wrong placement won’t provide you seamless wifi experience. Avoid placing it in a closed box, behind heavy furniture or near metal or electronic items.

Netgear AC1900 Setup Using Web Interface

Although you can follow the same above mentioned setup method for setting up an AC1900 extender. But just to provide an alternative we are here with another setup method.

  • Put the extender closer to the router and power it on.
  • Thereafter, pick any smart device from your collection. Use it for building a connection with the AC1900.
  • There are two options. For wireless connection, enable the wifi on your selected device. Choose the correct network name and type in the password. Check the Netgear AC1900 Setup quick user manual for finding the correct information.
  • The second option is more favorable as it ensures a stable and strong connection. So for this use ethernet cable, connect one end to the AC1900 extender and other end to the smart device.
  • As the connection is established, moving further launch any internet browser like Google Chrome, Safari or any other.
  • Now make your way towards the address bar of the selected browser. Therein type the default IP address and then hit the Enter key.
  • Further, fill up the login information and click on the Login button.
  • Now to complete the Netgear AC1900 Setup, start following the web instructions one by one.
  • After completion, move the extender to your desired location, so it can do its job of eliminating connectivity issues and expanding signals.
Netgear EX6100 Setup

How To Setup Netgear EX6100: A Complete Guide

Netgear extenders are widely used by people to extend their router’s signals. EX6100 is the most popular model of Netgear range extender used by people to eliminate dead spots. With the Netgear EX6100 Setup you can boost up your WiFi signals to ensure a strong connection in every corner of your space. Setting up the Netgear range extender is easy. This guide will walk you through the entire process step by step, must read till the end!

Netgear EX6100 Installation

Installation of the range extender hardware device is mandatory before setting it up. Installation process may include following steps:

Unbox the Netgear Extender

Unboxing of the netgear range extender device is the first step of installation. The box of extender might contain following items along with the extender device:

  • Power adapter
  • User manual
  • Ethernet cable

Place the Extender

Placement is a very crucial step. If your placement is not appropriate then you can’t get the best out of the device. So, be careful while choosing the placement. While performing Netgear EX6100 Setup you need to place the device proxy to your host router device. Later on you can again place it to optimize the network.

Power the EX6100

Powering the Netgear EX6100 is important to turn on the device. To power up the device, you need an electric outlet. Connect the extender to power using the adapter you receive along with it.

Netgear EX6100 Setup Process

Now you can initiate the Netgear EX6100 Setup by using the web interface. Check out the steps to move ahead:

Connect To Netgear Network

Prior to initiating the Netgear EX6100 Setup page you need to connect your computer/ laptop with the extender network. Use wifi settings of the device for wireless connection. On the contrary, for wired connection take the ethernet cable to join both the devices ethernet ports.

Access Web Interface

Accessing the web interface will be the next step of the setup process for which you need to launch google chrome or other browser you have. Search for www.mywifiext.net web address to access the admin account of netgear extender. Thereafter use the default admin details to enter the admin panel.

Configure The Extender

Once you get the access to www.mywifiext.net web address, you need to move further to initiate the Netgear EX6100 Setup. Go to the advanced section of the settings and search for setup wizard. Select it to get the guidance on setup. Now the screen will prompt you to enter the host router’s details. Here you have to enter the SSID and password of your existing host network device with which you wish to connect your netgear extender.

Secure Your Extender Network

Create a SSID for your extender network to keep it different from your router’s network. Also secure it with a new password. So, anyone aware of default settings can not access your network.

Finalize The Configuration

Do the other necessary settings including firmware update, admin password change etc. Once your settings are done, select “apply” option to complete the setup.

Netgear EX6120 Setup

How To Do Netgear EX6120 Setup In Extender Mode?

Netgear EX6120 is a device that can be set up in extender mode as well as access point mode. Today, in this article we are going to elaborate how to do the setup in extender mode. Netgear EX6120 Setup will not take too much time. Anyone can do the setup with a little knowledge about the process. With the device you can extend your current network and eliminate WiFi dead zones from your space. Our guidance will surely help you with the setup of the Netgear EX6120 device. Read out the further given content of this page to know in detail.

Netgear EX6120 Setup Process

Setting up the device in extender mode can be done through two ways. First method is WPS which is much easier than the other (web) method. Web based Netgear EX6120 Setup will take a little longer time than the WPS method but it allows you to enhance security of the network. Check out the step by step guide to follow in both the methods.

WPS Setup of EX6120

WPS based setup of your netgear EX6120 is quick, easy & straight. Anyone can do it within 10 minutes. Using this method has a drawback, you can’t set a separate SSID & password for your extended network. The same SSID with _EXT will be created automatically as the setup completes. Also you have to use the same password as your existing network has to use the new created network. Steps to proceed with WPS based method includes:

  • Begin the process by powering your new netgear EX6120 device.
  • Thereafter check its LED and when it stables then proceed the setup by pressing WPS button.
  • Hold it for 6 seconds and then release it to move ahead.
  • Next you should press the WPS on your home network device (host).
  • This whole process should be completed within 2 minutes to avoid failure.
  • Wait and monitor the device till its LED turns solid green in color.
  • In case the device LED doesn’t turn solid green or display any other color it signifies the process fails.

Web Setup of EX6120

  • To begin the Netgear EX6120 Setup using this method requires a computer or laptop device with an updated web browser version.
  • Secondly, you need to turn the power on by connecting the Netgear EX6120 device to the power.
  • Once the device power is on you need to start configuring it by connecting a device with its network.
  • Thereafter you should open the web browser you have in the device and then search for mywifiext.net
  • Access the portal and search for new extender setup option to proceed with Netgear EX6120 Setup
  • Move further by following the on screen guide and create a netgear account
  • Choose the “WiFi range extender” option from the opened screen.
  • Proceed with selecting your home network SSID and then provide the password as well.
  • Choose the connect option from the screen to complete the setup process.
  • Create a SSID for your new extender device & a password too.
  • You may use the similar SSID & password as your current network has.
  • Furthermore, we advised to keep a secured password to protect any unauthorized access.
Netgear EX6100

Easy And Quick Setup Guide For Netgear EX6100

It is so common to face connectivity issues and dead spots when you only rely on routers. So it’s high time to get wifi range extenders. As they not only provide solutions to connectivity issues but also improve the overall performance of existing wifi networks. When it comes to range extenders, nothing beats Netgear EX6100 Setup. This magical range extender is the perfect choice for extending both office as well as home networks. With its successful installation you get to enjoy high speed and wider coverage in every single corner.

Overview Of Netgear EX6100 Range Extender

It is a little box with so many great features. The Netgear EX6100 Setup provides fast internet speeds of upto 750Mbps. Additionally, the fast lane technology with the use of dual bands creates a one high band connection. Further with the presence of Ethernet Port you can easily connect wired devices for direct connection. Moreover the external antennas are a game changer as they provide stable and wider coverage.

To be specific on the front panel of the extender you get different smart LED light indicators. These indicators help in the easy installation process as well as clearly depicts the actual working of the extender.

Whereas on the side panel of the Netgear EX6100 Setup you get one Ethernet port, power On/off button, WPS button, a Reset button and lastly a access point/extender switch button.

Installation Steps

Now as you are familiar with the complete feature set of Netgear EX6100 Setup, it’s time to move forward to the installation process.

Step 1: Place The Extender And Power It On.

NETGEAR recommends users to place the EX6100 near to the router during initial setup. As the installation completes, you can move the extender to a desired location which is ideally halfway from the router and the area with connectivity issues.

After the placement, plug in the EX6100 to a power source. Power it on and wait for the power LED on the front panel to turn green. If the power LED doesn’t light up then turn on the power button from the side panel of the extender. Further ensure the switch on the Netgear EX6100 is set to “EXTENDER” as the WPS method is for that only.

Step 2: Connect With WPS

With the WPS based Netgear EX6100 Setup method you do not need to enter the username or password. Simply push the WPS button from the side panel of the EX6100 wifi range extender. Wait for the WPS LED on the front panel to blink Green. It indicates that the extender is ready for the WPS connection with the router. Now within less than two minutes push the WPS button on your home router. The whole setup process gets completed within a few seconds and eventually the WPS LED stops to blink and turns solid green.

Lastly, check the router link LED on the EX6100 extender. If it is solid green then the connection is best and successfully done.

Step 3: Connect And Relocate

Finally, connect your devices to the new network. For easy identification the newly extended network name of the EX6100 will now have _EXT added at the end. Connect to it by using the same security key (password) as that of your router. Once connected check the client link LED. It should be solid green for the best connection.

Netgear Extender Setup

Complete Guide to 192.168.1.250 Netgear Setup

The use of the internet in our daily lives is very vast and common. Due to which one single router cannot fulfill all the needs effectively. Users either face the issues of dead zones, intermittent internet connection or poor connectivity and much more. This is where the Netgear Extender Setup comes in for the rescue. The successful setup of the Netgear Extender can make a huge difference. It not only covers your entire area but also provides fast and reliable internet connection to your each device. So, this guide will walk you through the 192.168.1.250 netgear setup process. To get the complete insights, keep on reading.

Steps For 192.168.1.250 Netgear Setup

The Netgear Extender Setup steps are very easy and simple to perform. Even the person who does not possess any technical skills can complete the setup independently.

Step 1: Power On

Firstly, plug in the Netgear Extender into a power outlet and switch it on. The power LED should light up. In case there is no light then push the power on/off button.

Step 2: Connect

Now for the further Netgear Extender Setup, select any smart device. Connect the device to the extender’s default wifi network. To connect, turn on the wifi and connect to the network name NETGEAR_EXT. Although it is an open network, in case the password is asked then enter “password” as a default password.

Step 3: Open An Internet Browser

Further, on the connected device open any internet browser like Google Chrome, Firefox, Safari or any other of your preference. But be sure that the chosen browser is updated and all the caches and cookies are cleared.

Step 4: Log In

To log in first go to the address bar of the browser and type 192.168.1.250 and press Enter. Alternatively you can also use the default web address for accessing the login page. The default web address is http://mywifiext.net. Now, enter the details and tap on “Log In”. Now after you login, tap on “NEW EXTENDER SETUP”.

Step 5: Follow The On-Screen Instructions

The last step for completing the Netgear Extender Setup is to follow the on-screen prompts precisely. It includes selecting the name of your local wifi network and entering its password. As the setup completes, check the connection by connecting your devices to the extended network.

Netgear Extender Setup Using WPS Method

If by any chance the 192.168.1.250 netgear setup doesn’t work for you or you are simply looking for an alternative to the above method then here you go. The WPS method is the least time consuming. All you need to do is just push the WPS button for the setup. But here the essential requirement is that your router should also have a WPS button.

  • So first place the Netgear range extender near the router.
  • Also make sure there are no physical barriers or obstructions in the middle of both the devices.
  • Now power on the extender and wait until the power LED turns solid.
  • Further press the WPS button first on the Netgear Extender and within the next 30 seconds push the WPS button on the router.
  • Once the synchronization is done, the WPS led on both the devices that is router and the Netgear Extender will turn solid thus indicating a successful Netgear Extender Setup.
  • Lastly, you can unplug the extender and move it to a new location where you were facing connectivity issues. But make sure it is within the range of the host router. To know about the same, take the help of the smart LED light indicators.
Disclaimer:- mywifiextlogsetup.com website is for customers who are seeking technical help and technological assistance/support service for WiFi extenders, routers, and WiFi networks. However, we do not have any endorsement, alliance, or affiliation with any brands neither direct nor indirect. All the images, brand names, product models, and logos are only for illustrative purposes. Guidelines provided on the website are solely for informational purposes. Neither a guarantee nor an implied warranty is provided regarding the content available on the website.