No More Dead Zones With Netgear EX6400 Setup
Netgear offers a vast variety of reliable and highly effective range extenders. One such head turner is Netgear ex6400 setup. After its proper installation, users get wider wifi connectivity. This particular range extender comes with a simple wall-plug design. This means no wiring hassles and no extra space for its placement. Further with the mesh technology, wifi signals are present from the front door to the backyard. So the users get to enjoy high speed wifi connection in every single corner of the abode.
Key Features
The Netgear ex6400 setup comes packed with every feature that is possibly required for today’s modern tech needs.
First it operates on dual frequency bands. One is 2.4Ghz and the second one is the 5GHz band.
- Next, users can fetch the speeds of upto 1.9Gbps on both the bands.
- Further the high power amplifiers and internal antennas provide wider coverage.
- Additionally the fastlane technology uses both the bands to provide one single and high speed connection.
- Moreover with the MU-MIMO technology, users get to connect multiple devices at one point of time.
- The Netgear ex6400 setup is compatible with all the standard routers thus no replacements required.
- The setup process is extremely easy as it supports one push Wifi Protected Setup (WPS) method.
- With the presence of an Ethernet port on the bottom panel, users can establish a reliable and stable connection with wired devices.
- Additionally, the repeater supports strong security encryptions to protect the Netgear ex6400 setup from cyber attacks.
Setup Guidance
For performing Netgear ex6400 setup process users do not need any tech degree. As the steps for the same are extremely simple and won’t take much time.
- Firstly unbox the package and take out the ex6400 wifi signal repeater.
- Move to the area where the host router is placed.
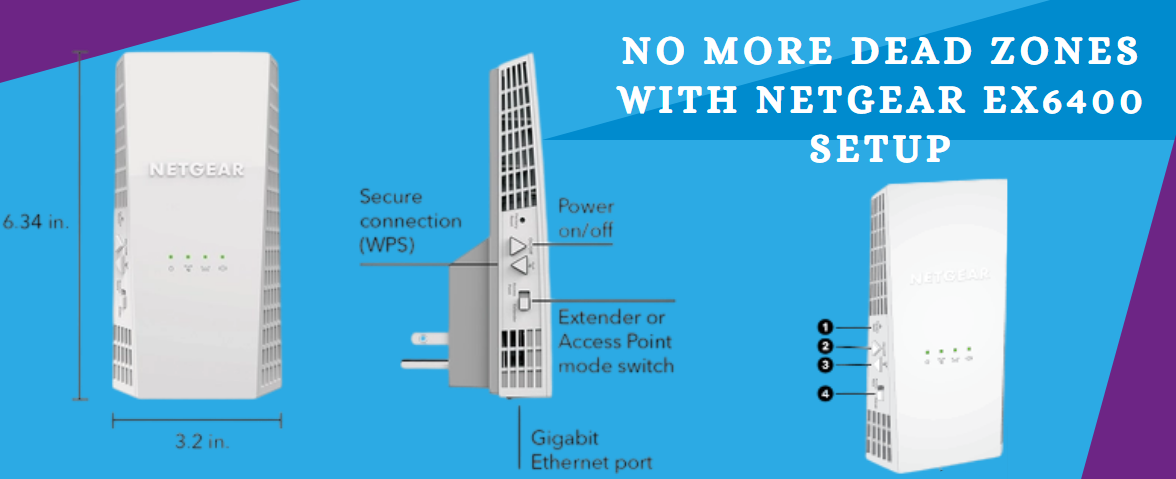
- Thereafter, plug in the ex6400 into a properly working power socket. Turn it on. Hold on for at least a minute to let the extender boot up properly. See the power LED on the front panel. A solid green light should pop up on it.
- Moving further, on the side panel of the ex6400 there is a WPS button. Push this knob. Hold onto the knob until the WPS LED starts to blink green.
- Next, take a turn towards the host router. Push its WPS knob as well. Now wait for the WPS LED on the Netgear ex6400 setup to solidify into a green color. This can take a few seconds or a minute.
- Lastly, unplug the extender and replug it in a new location. The new location shouldn’t be too far from the host router. To check the connectivity, take the help of LED light indicators. The WPS LED as well as the router link LED should be green in color. If not, then reposition the extender.
As the Netgear ex6400 setup completes you can connect any wifi enabled device. After a successful connection the client link LED also lights up in a solid green color thus indicating a best connection. Whereas a red light on it depicts poor connectivity. Therefore move the client device closer to the ex6400 to reverse red light into green light.