netgear ac750 setup

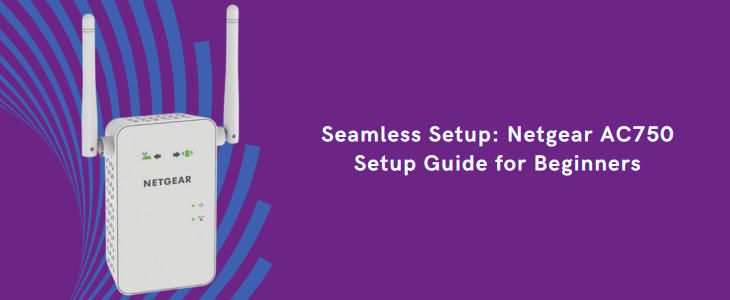
Seamless Setup: Netgear AC750 Setup Guide for Beginners

New to wireless wifi network setup?

All of us have been there at some point. But it seems difficult and confusing until you start doing it. Anyone can set up their wifi mesh systems if provided with the right instructions and professional help. Therefore, we are here for you. In this blog, you will find all the information about the Netgear AC750 setup. In addition, the configuration of any network system consists of two factors right equipment and the accurate following of the instructions. Let’s help you arrange both.

Towards The Right Equipment

  • Buy an ethernet cable if you didn’t get it along with the extender. Check it properly. It is responsible for the data supply from the router to the extender. So, it should not be damaged in any way.
  • Check the power outlet. Ensure it has an optimal power supply and is connected to the inverter as well.
  • Prepare your device beforehand. Charge and update it. This seems like a nominal factor but is proven to be very important to accelerate the installation process.

Some Additional Arrangements

  • Identify the dead wifi spots in your house and choose a place for your extender accordingly.
  • You will need your SSID and password to complete the login process. These are usually given on the label of your extender device.
  • Check your internet supply. The Internet should be stable enough to support the whole setup process.

Connecting The Extender To The Router

Connecting devices is the first step for the Netgear AC750 setup. There are three methods that you can choose from to do that. You can choose any method according to your convenience.

  • Ethernet cable method.
  • Wireless method.
  • WiFi Protected Setup (WPS) method.

Login Via Mobile App

  • Download the Nighthawk app.
  • Make sure you download the updated version.
  • Make an account if you are using the app for the very first time.
  • Just enter your name and set a strong password.
  • Then, open the extender model list.
  • Click on the Netgear AC750 setup.
  • Now click on the login button.
  • Enter your SSID and password.
  • The Login will be successful in a few seconds.

Alternative Method: You can use any web browser also. Launch a web browser and enter 192.168.1.1 in the address bar. The setup page will display on the screen. Other steps are the same.

Setting Up The Extender

  • You are advised to personalize the general and advanced settings before completing the setup process.
  • Open your laptop or computer whatever you are using.
  • Access the wifi settings of your device. Disconnect from the extender network and connect to the existing router with the previous password.
  • Restart your device to save all the settings and get a renewed internet experience.
EX2700 Netgear Extender

Troubleshoot EX2700 Netgear Extender Issues

To troubleshoot the Netgear EX2700 extender error, there are some simple solution trips. By trying the direction of those solution tips you can quickly fix the extender error. Now, read this page to fix the extender error.

Upgrade Netgear EX2700 Extender Firmware

To upgrade the EX2700 extender, early you will required to access the web management page. To visit the web management page, take the computer and connect with the EX2700 extender default WiFi network. Later, open the browser and type Netgear extender default web portal in the address bar. Now, fill in the information shown on the display page. After that, look and tap on the network administration option. Further, pick or choose the software installation option and install the latest software file of the Netgear EX2700 extender on your laptop or computer.

Power Down EX2700 Extender

To power down the Netgear extender, press the power button of the extender to turn it off. After that, from an electrical socket take out the Netgear EX2700 extender power plug. Later, wait for a few minutes and place the Netgear EX2700 WiFi range extender power plug back into a power socket. In the end, press the power button again to turn on the EX2700 WiFi range extender.

Swap EX2700 Extender Location

When you are swapping the location of the Netgear EX2700 extender, then we suggest you place the extender at the central or optimal location. The central location of your office or house is the best place. Make sure that near the EX2700 Netgear extender don’t place metal or electronic appliances. Electronic types of appliances absorb WiFi signals that come from the EX2700 Netgear extender.

Reconstruct Netgear Extender

Early, look for the reset button on the Netgear EX2700 extender. Now, press the reset button by inserting the pin. Later, all the Netgear EX2700 extender LEDs will turned off. All off LEDs of the Netgear EX2700 extender tell that the extender is completely reset now.

Note:- After resetting the extender, do the Netgear EX2700 setup process again.

Configure EX2700 Extender By WPS

Bear In Mind:- Make sure that your home or existing router supports the WPS button. The WPS method is an uncomplicated method to execute the Netgear EX2700 setup process. For this method, place the extender power plug in the socket near the router. After that, look for the WiFi-protected setup button on the extender or router. Later, push both the extender and router WPS buttons. By pushing, the WPS LED starts blinking solid blue, which means the EX2700 Netgear extender successfully connects with the router.

After the entire directions of this article, we hope you can able to fix the Netgear EX2700 extender error. If you still face an error in the extender then feel free to contact our technician. Our technician will help you and solve your issue.

Netgear AC1750 Setup

Say Goodbye to Weak Signals with Netgear AC1750 Setup

In today’s digital world, everything works with the help of the internet. We need access to the internet as soon as our day starts. Whether it be a simple smartwatch to keep track of our health, cooking with the help of YouTube videos or doing research in any field. Every home has multiple devices from mobile phones, iPads to smart TVs, due to which many times all the devices don’t work properly due to a lack of signals or dropped connections. But now no more as we have a perfect solution for you and it’s none other than the Netgear AC1750 setup for your home or office.

Netgear AC1750 Setup Features

  • Dual-band technology for faster speeds and better coverage.
  • Three external antennas for improved range and performance.
  • Gigabit Ethernet ports for high-speed wired connections.
  • USB ports for sharing files and connecting printers.
  • Parental controls to manage internet access for kids.
  • Guest network access to provide secure Wi-Fi for visitors.
  • Easy setup with the Netgear app.
  • Beamforming+ technology for targeted Wi-Fi signals.
  • WPA2 wireless security protocols for enhanced network protection.

Netgear AC1750 Setup Guide

Here’s the simple and straightforward method for the Netgear AC1750 setup.

  • Start by unboxing the router and connecting it to your modem with the provided Ethernet cable.
  • Now, plug in the power adapter and turn on the router.
  • On your computer or mobile device, go to the Wi-Fi settings and connect to the default network name of the router, usually something like “NETGEAR” followed by numbers.
  • The next step is to open a web browser and enter “www.routerlogin.net” or the default IP address “192.168.1.1” in the address bar.
  • Once you enter the above web address and press “Enter” you’ll be asked to enter the default username which is “admin” and password which is “password” to access the router’s admin page.
  • Follow the on-screen instructions to configure your Wi-Fi network name and password. You can also set up security options like WPA2 encryption.
  • Once the setup is complete, the router will restart, and you’ll need to reconnect your devices to the new Wi-Fi network.

In case the above-mentioned method is not convenient for you we have an alternative for you. Here we go:

In addition to the web browser method, you can also set up the Netgear AC1750 using the Netgear Genie app. The app is available for both iOS and Android devices. Simply download the Netgear Genie app from the respective app store and connect your mobile device to the default Wi-Fi network of the router further follow the instructions in the app to complete the setup process.

That’s it! Your Netgear AC1750 setup is ready to use. If you have any issues or need further assistance, feel free to contact the Netgear customer support team.

Netgear EX3700 Setup

Unlocking Peak Performance: Netgear EX3700 Setup Tutorial

Confused about your extender’s setup instructions and their implementation?

You couldn’t be in the right place than this. There is no other landing page that can clear your doubts about the Netgear EX3700 setup. No matter if you are tech-savvy or totally new to wireless wifi extenders. You will be able to set up and troubleshoot most issues after completing this blog. Let’s get straight to the point without wasting any time. Grab your extender, laptop, and coffee, and get ready to transform your average internet connection with a skyrocketing speed.

Contextual Settings

  • Unbox the extender package and gather all the items.
  • Note down your SSID and password from the label.
  • Keep the user manual guide by your side. You will not need it though after reading this blog.
  • Check your internet connection if it is stable enough to support the whole Netgear EX3700 setup.
  • Choose an appropriate place for your extender.

Arrange Internet Supply For The Extender

  • Wireless Connection – Access the wifi network setting on your laptop. Click on the network name you want to extend. Extend it by selecting the extender name from the list and filling in the noted password.
  • Wired Connection – Take the ethernet cable you found in the extender box. Use it to connect your router and the extender.
  • WPS Connection – Press the WPS button on your router and then on your extender within two minutes. The WPS light will stop blinking once the connection is successful.

Access The Web Interface Of Netgear

The heading seems like you have to perform some complicated steps. But the reality is the opposite. This step includes filling in your SSID and password into the login interface just like you do in your social media accounts. The role of this step is to provide you access to a unique account of Netgear. By doing this, you can customize your extender’s settings anytime, know about the updates and launch of new products, and even ask for help. So, stop overthinking and grab your noted login credentials.

  • Download the Netgear app on your smartphone.
  • Choose your extender model from the list.
  • Make an account by entering your name and password.
  • You will see the Login option. Click on it.
  • Now, enter the SSID and password into the login interface.
  • Type all the letters accurately to prevent the hassle.
  • The login will be successful in a few seconds.

Alternative method: You can perform the log in via a web browser. Just enter 192.168.1.250 in the address bar and enter your login credentials.

Personalize The General Settings

  • Click on the Settings button on the Setup page.
  • Change the SSID and password to secure your network.
  • Set the number of devices that can connect to your network.
  • Manage Parental Control and Guest Mode features.
  • Set up Port Forwarding for protected traffic management.
  • Check Firmware updates and keep the updates on automatic mode so you do not have to check from time to time for pending updates.
  • Click on Done to save the changes.

Note: You can customize the settings at any time and make the changes you want. So, there is nothing to fret about if you have missed one or more options.

Just One More Minute And You Are Done

  • Go to the wifi settings of your device.
  • Connect to your existing router by entering the previous password.
  • Unplug the extender and place it near the dead wifi zone of your house.
  • Feel free to try new placement spots unless you get the best signals.
  • Try to shorten the distance between the router and the extender if the connection breaks.

And, the Netgear EX3700 setup is done with these last steps. Enjoy the seamless and reliable internet connection for working, streaming games, entertainment, and much more.

Keep evolving with advanced and scalable network systems.

Disclaimer:- mywifiextlogsetup.com website is for customers who are seeking technical help and technological assistance/support service for WiFi extenders, routers, and WiFi networks. However, we do not have any endorsement, alliance, or affiliation with any brands neither direct nor indirect. All the images, brand names, product models, and logos are only for illustrative purposes. Guidelines provided on the website are solely for informational purposes. Neither a guarantee nor an implied warranty is provided regarding the content available on the website.